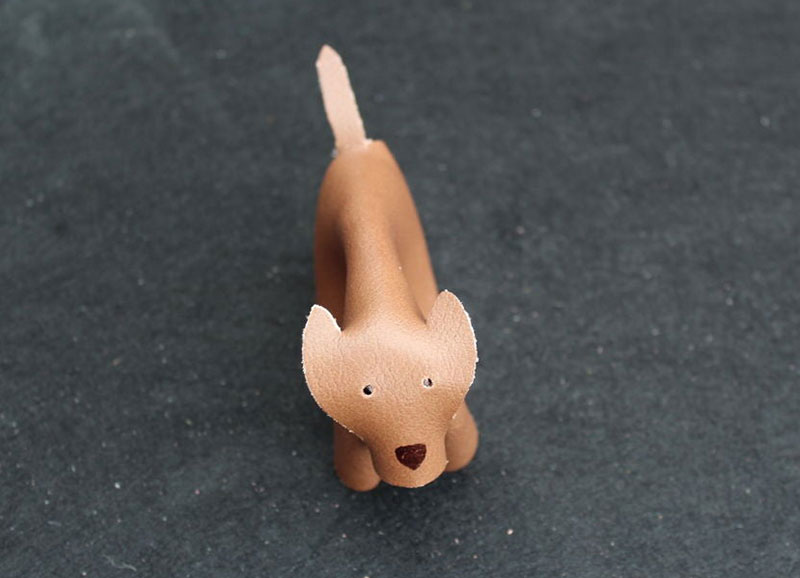
如果你像我一样,喜欢废物利用,那么你很可能家中有一些废旧皮革(我这是旧沙发皮),你可以将其用于制作这个简单而可爱的小件。毕竟,谁能抵抗一只可爱的狗子?这个小东西花了我不到一个小时的时间,并且可以放大缩小打印,这样就可以做一窝狗子啦^^
Step 1: Supplies

You will need:
Paper for tracing the pattern
Piece of scrap leather (approximately 16cm squared)
Craft knife or scissors (strong enough to cut leather)
Leather hole punch
Strong sewing needle
Strong thread
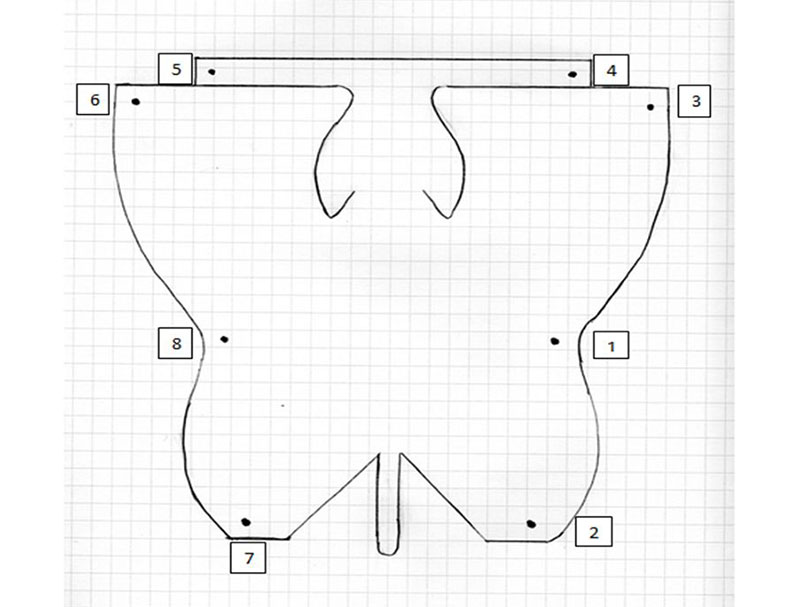
Step 2: Pattern
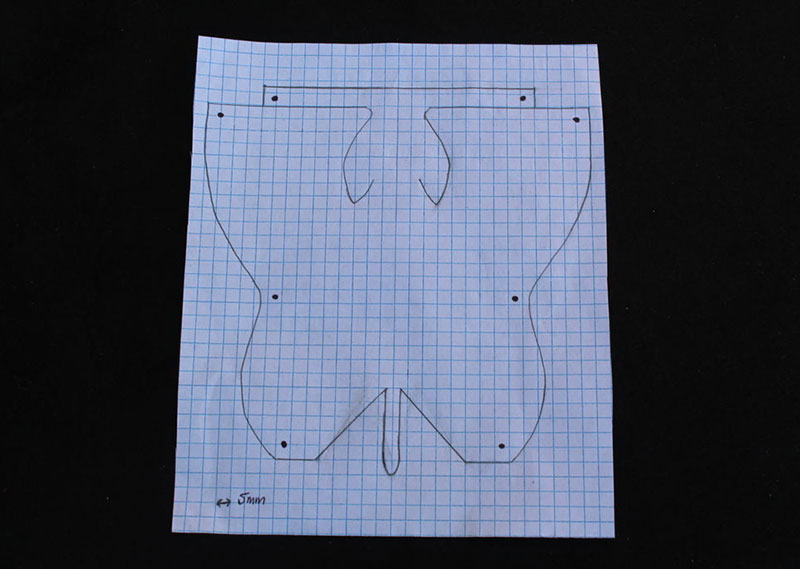
Print out or copy the pattern. The image shows the pattern on 5mm square paper which fits on to the 16cm squared leather scrap and produces a dog that is approximately 11cm long, 7cm high and 5cm wide.
Cut out the paper template from the PDF attached.
下载图纸
http://img2.pixiaojiang.com/20200629Dog.pdf
Step 3: Transferring the Pattern
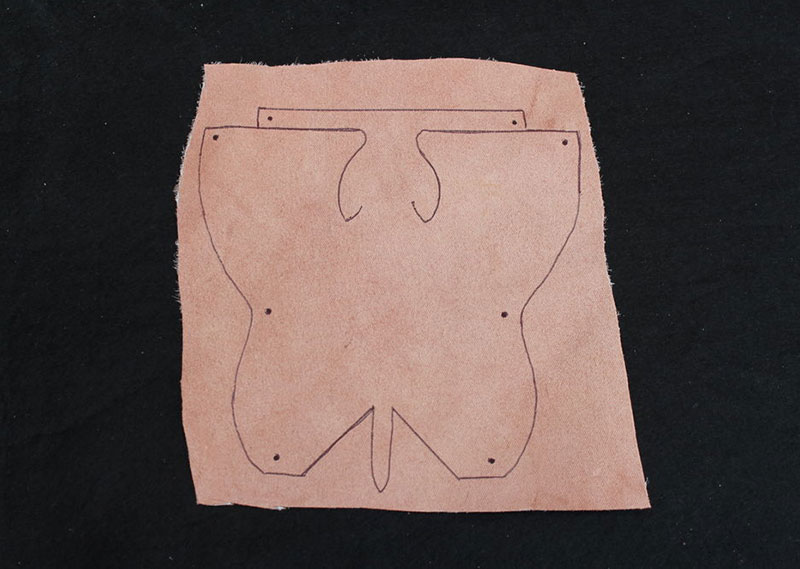
Place the leather face down and position the template to fit within the leather.
Trace around the outline of the template using a pen, ensuring that you mark the lines around the face and the ears.
You will then need to mark the positions of the holes as shown in the template by the dots. I did this by leaving the template on the leather and using a permanent marker to mark the position of the dots which then transferred through to the leather.
Step 4: Cutting the Leather
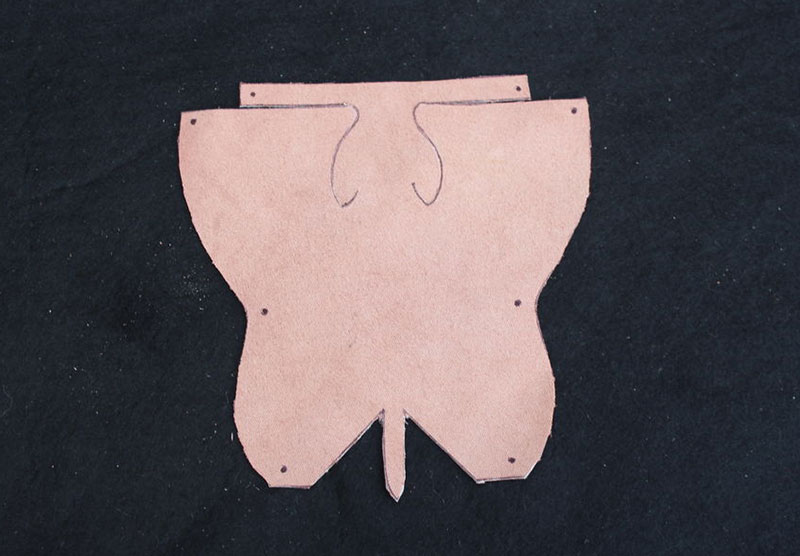
Cut around the outline on the leather using a craft knife or strong scissors.
Using the leather hole punch tool on the smallest setting, punch the 8 holes out as indicated.
At this stage, I turned the leather over and scored the leather at the base of the tail using a craft knife. This will allow for the tail to stand up when you fold it.
Once done, turn it back to its original position with the leather face down.
Step 5: Start Sewing

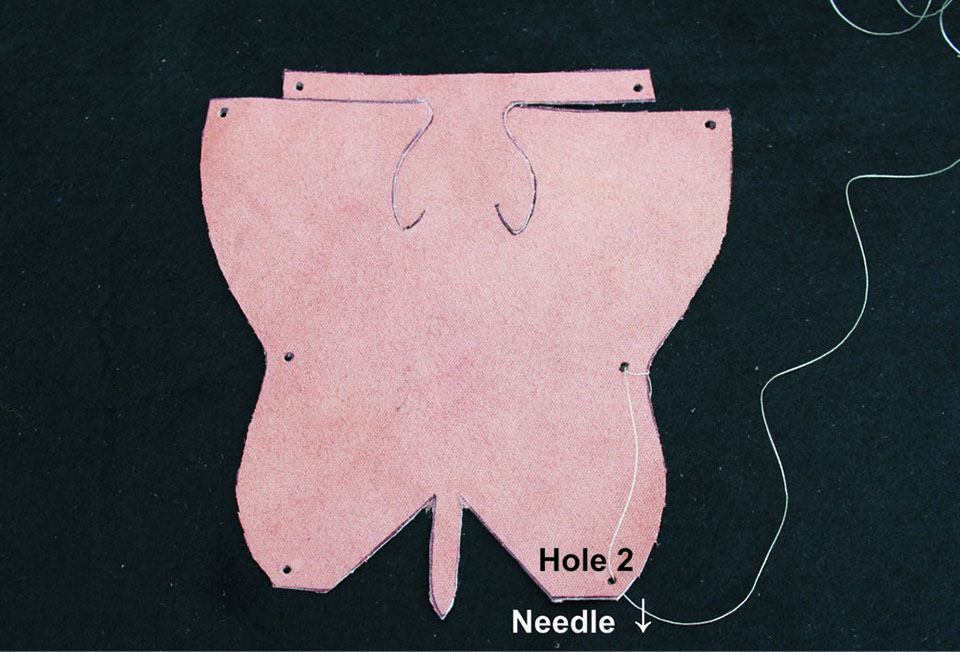
Thread approximately 50cm of thread on to your needle (if you can find a thread color to match your leather that would be preferable but don't worry if not. I used contrasting thread to make it stand out in the photos).
Knot the thread securely from hole number 1 to the outer edge, it is important that it is a secure knot to make sure it doesn't come apart.
Once the thread is secure, pass the needle up through hole number 1 from underneath.
Pass the needle down through hole number 2.
Step 6: Continue Sewing
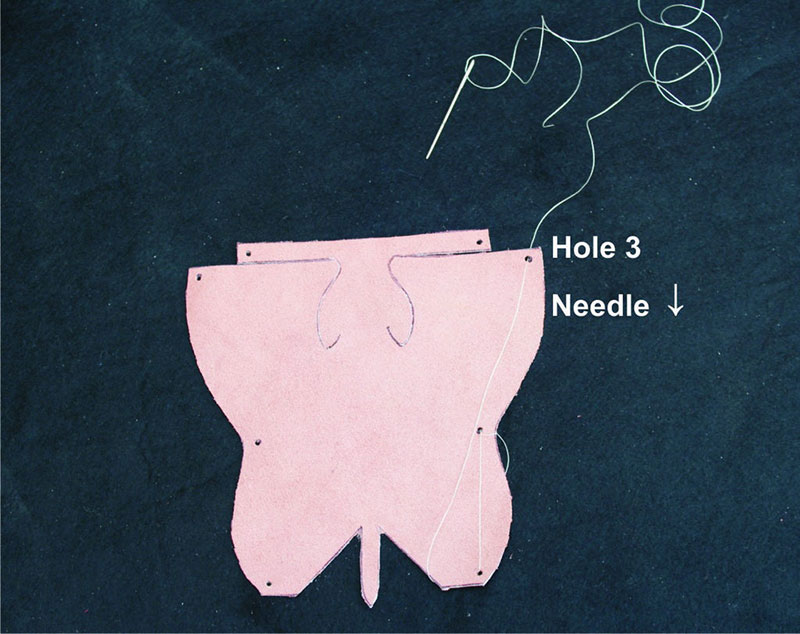
Bring the needle and thread up and over from near the tail and down through hole number 3.
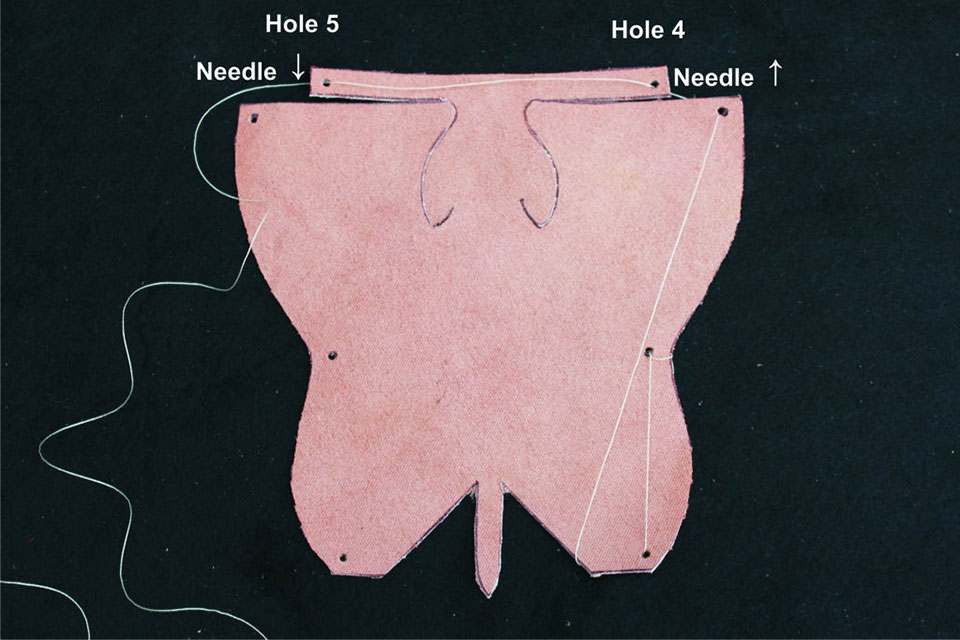
For the next stage, bring the needle and thread up through hole number 4. Then carry it across and down through hole number 5.
Step 7: Finish Sewing
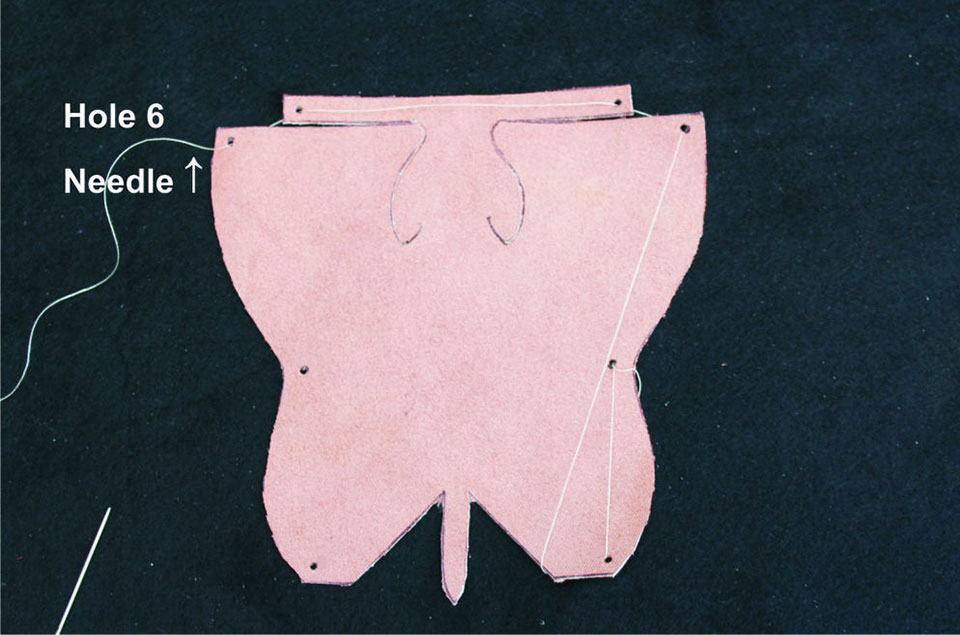


Bring the needle and thread up through hole number 6.
Take the thread over towards the tail and bring the needle and thread up through hole number 7.
Finally, take the needle and thread down through hole number 8.
Step 8: Pull the Thread Tight


Now that the sewing has been completed, start to pull the thread through tightly.
All of the thread holes will be pulled towards the middle.
Once the thread is as tight as it can be, as shown in picture 3, secure the shape by passing the needle and thread through from hole number 1 to hole number 8 several times.
Tie the thread off securely.
Step 9: Finishing Touches
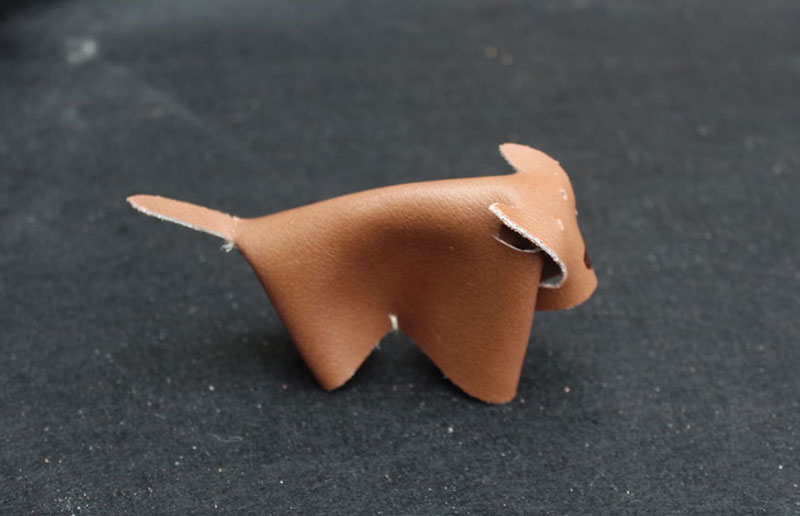
Now the basic shape is complete, your dog requires eyes and a nose.
I have added the eyes using the leather hole punch inserted from behind the ear on both sides. You can choose to draw or paint the eyes on yours, if you wish.
I used permanent marker pen to draw on a triangular nose.
Finally, fold the tail upwards.
I hope you enjoy this fun up-cycling craft!