图纸http://www.pixiaojiang.cn/pattern/1980
YOU WILL NEED:
• Bag Fronts, Flaps, Gussets & Connector Strap 8 To 9 Oz. Leather
• Bag Backs, Handles, Billet Straps & Stiffeners 9 To 10 Oz. Leather
• Buckle Straps 6 To 7 Oz. Leather
• 4 Medium Rapid Rivets (#1120-01 Or #1381-12)
• 28 Large Rapid Rivets (#1275-12 Or #1375-12)
• 4 Clips With 3/4” Dees (#1120-01)
• 4 (1”) Single Prong Roller Buckles (#1516-02)
• 4 (1”) Strap Keeper Formed Loops (#1137-04)
• 4 Bag Clasps (#11506-00)
• 12 Yards 5/32” Latigo Lace
• 8 Yards Waxed Thread & Needles
• 1/16”, 1/8” & 5/32” Hole Punches
• 1” Bag (Slot) Punch
• Leather Knife & Skiver Or Safety Beveler
• Adjustable “V” Gouge (#31811-00 Or 8082-00)
• Rivet Setter (#8100-00)
• Jumbo Perma LokTM Needle (#1193-00)
• 2 Pieces Of Hook & Loop Fastener (each 2” X 9”)


ASSEMBLY:
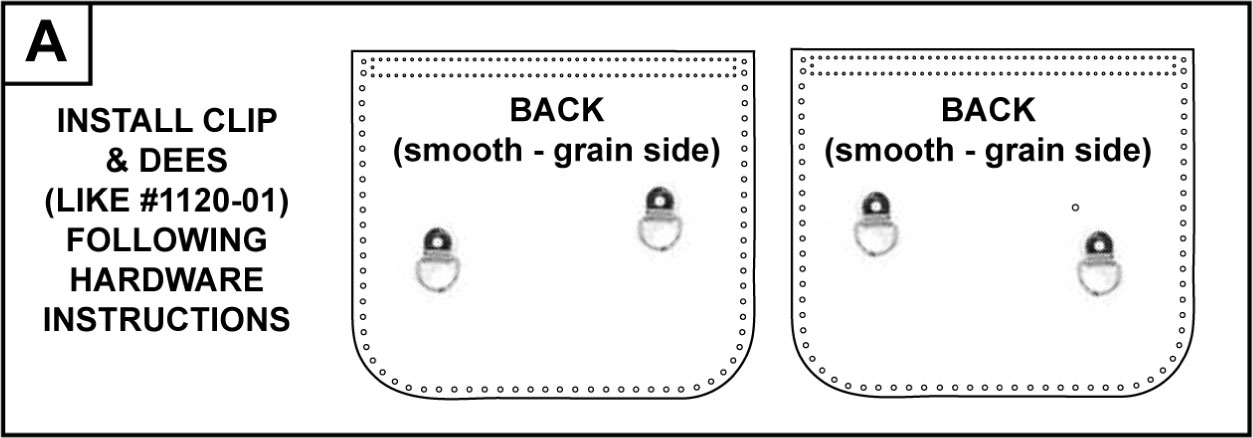
Step 1: Install all hardware where indicated on pattern parts.
• Select 4 clip and dee sets and install on both saddle bag back parts with 4 medium rivets (A).
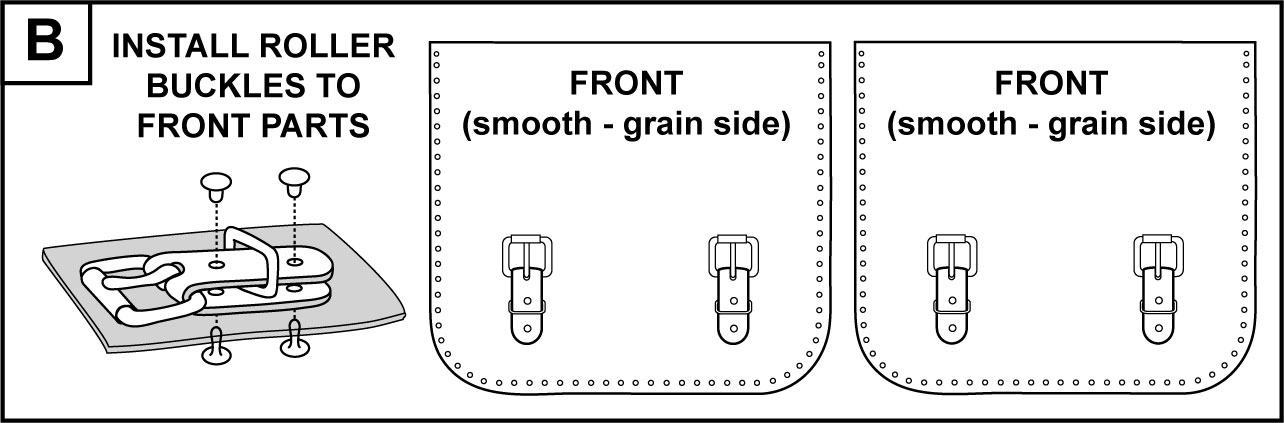
• Install roller buckles onto buckle straps. Then rivet 2 straps to each bag front as shown (B).
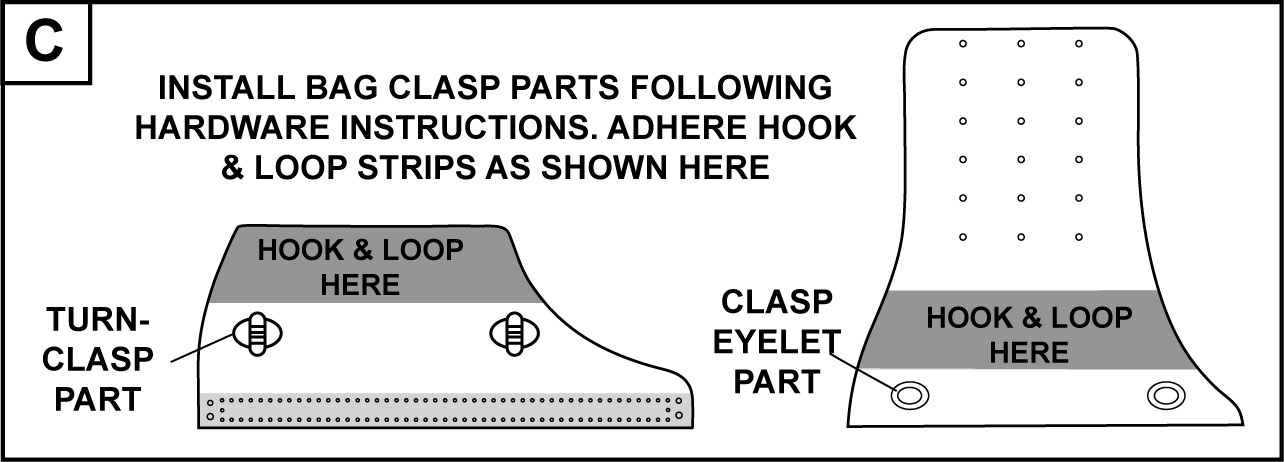
• Select clasps (such as #11506-00) and install:
Turning part of clasps on both lower connector strap parts & clasp eyelet parts on both top connector strap parts) where indicated on patterns, following instructions that come with your desired clasps.
Step 2: Install all hook & loop pieces (C) on lower & top connector strap parts where indicated on patterns using contact cement.
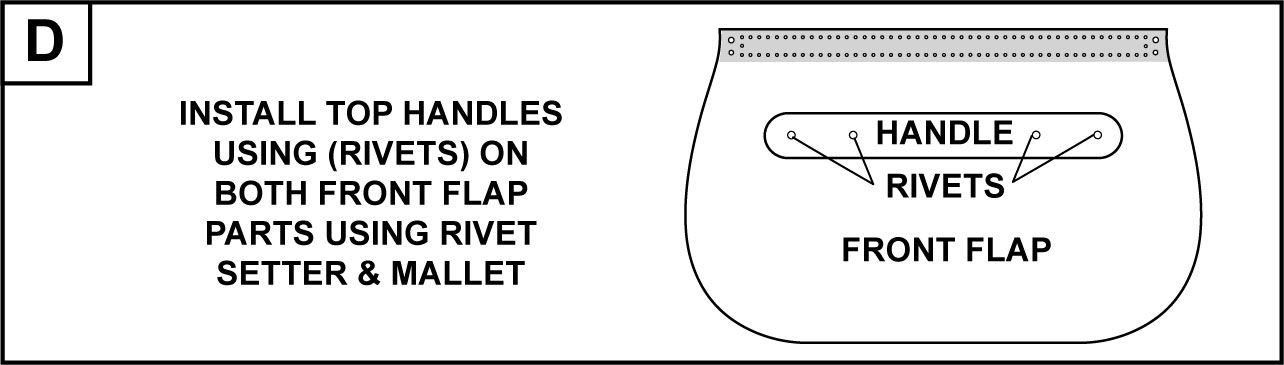
Step 3: Install handle to front flaps using rivets (D).
Step 4: Insert 2 straps under handle between rivets, aligning stitching holes in straps over 10th, 11th and 12th holes in from each side of flap, as shown (E).
Step 5: Place back part under pre-assembled front part with straps inserted under handle, aligning all holes. Place lower connector strap part on top, aligning holes with other parts (E).
Step 6: Stitch back, flap and lower connector strap parts together with 4 yards of thread and needle as follows: From rough side of back, stitch up through first aligned stitching holes in back, flap and lower connector strap leaving 6” of thread on rough side of back to tie off later (E). Stitch in and out through all aligned holes back to starting hole. Turn and stitch back around filling in between previous stitches. At last hole, stitch to inside of bag (rough side of back) and tie off with 6” end. Trim excess close to knot. (Optional knotless ending: At last hole, stitch back through 3 holes to rough side of back. Remove needle and attach to 6” end. Stitch 6” thread end back through 2 holes to rough side of back. Trim both ends close to knot. Tap with mallet to secure.)
Step 7: Overlap ends of 2 gussets (smooth - grain sides up) aligning lacing holes (F). Trim one end of 18” piece of lace to a point and screw on Jumbo Perma-LokTM lacing needle. Insert lace between gusset pieces down through second hole in lower gusset piece only, leaving 2” of lace (F Inset). Lace back through 1st hole in both pieces, then back down through second aligned holes (F). Pull lace tight to secure end. Do not allow lace to twist. Continue lacing in and out to last hole. Lace down through last hole, then back through previous hole in one gusset piece only. Pull lace out between gusset pieces to rough side and trim excess.
Step 8: Rivet 1 stiffener to gusset assembly, flesh sides together, with 4 large rivets (F).
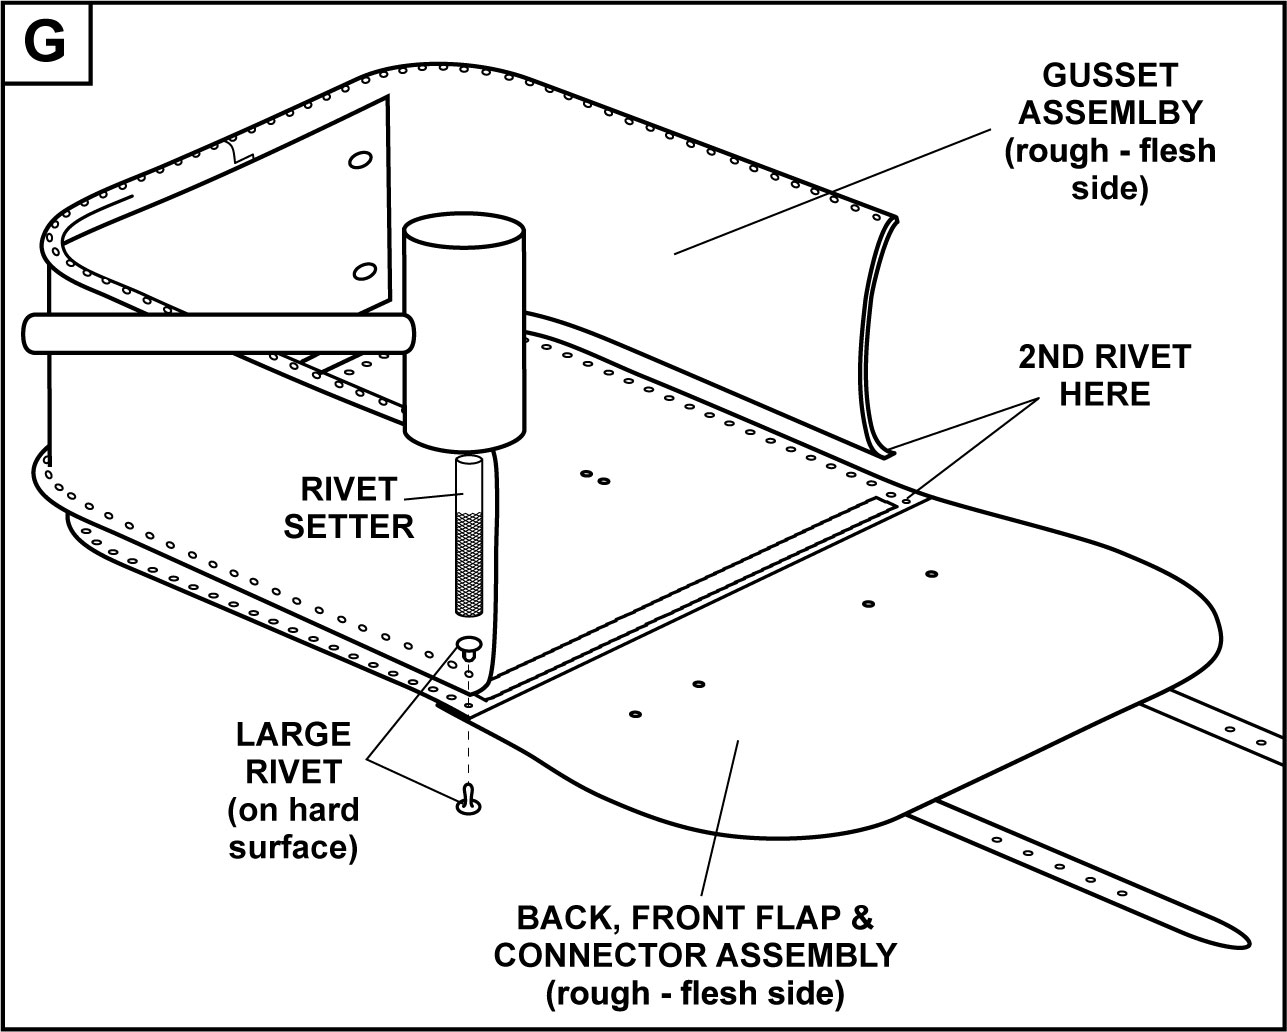
Step 9: Rivet back assembly to gusset assembly with two large rivets (G).
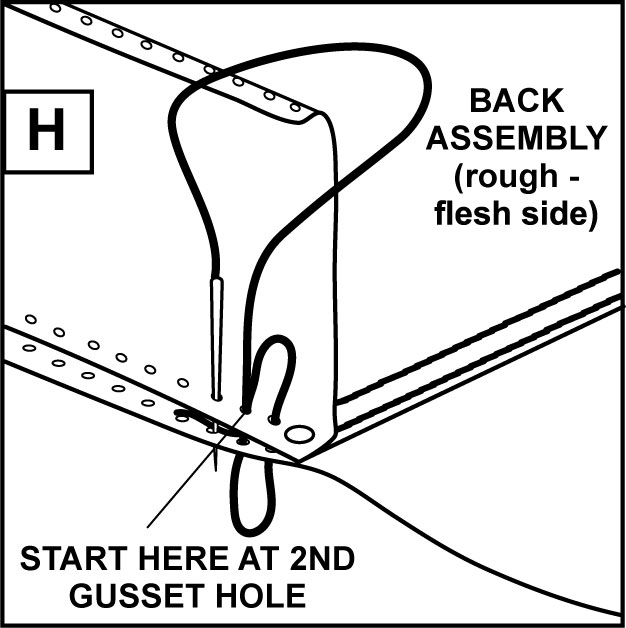
Step 10: Lace back assembly to gusset with 2 yards of lace as follows: From inside of bag, lace up through second hole (from rivet) in gusset part only, leaving 2” of lace between back and gusset parts (H). Next, lace down through first aligned holes in both parts. Lace back up through second aligned holes in both parts. Continue lacing around back and gusset parts to rivet on other side. At last hole, turn and lace back through previous hole in gusset only to inside of bag. Pull lace tight to secure and trim off excess.
Step 11: Rivet front assembly (rough side facing back assembly) to gusset with large rivets as explained in Step 6 (riveting back assembly to gusset, shown in G).
Step 12: Lace front assembly to gusset as explained in Step 10 (lacing back assembly to gusset, H).
Step 13: Repeat Steps 1 - 9 on second bag.
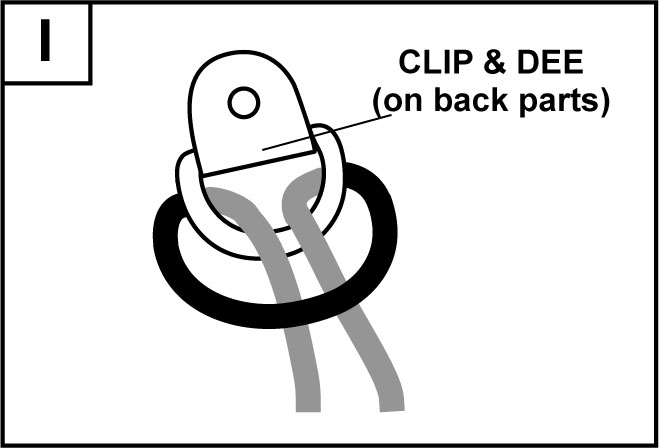
Step 14: Attach 27” long lace to each dee on backs. Fold lace in half and insert loop through dee. Loop over ends. Pull tight (I).
Step 15: Connect removable top connector straps to lower bottom connector straps with pre- attached hook & loop and clasp.
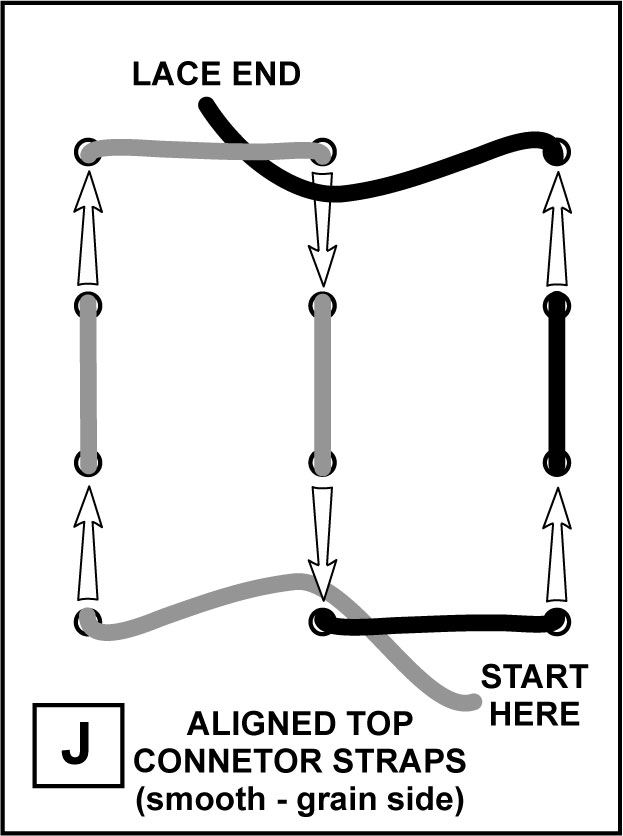
Step 16: Lace adjustable top connector straps together with 1 yard of lace to complete. Overlap and align holes at desired position. Start lacing on grain (smooth side) as shown (J). Trim lace ends to desired length.
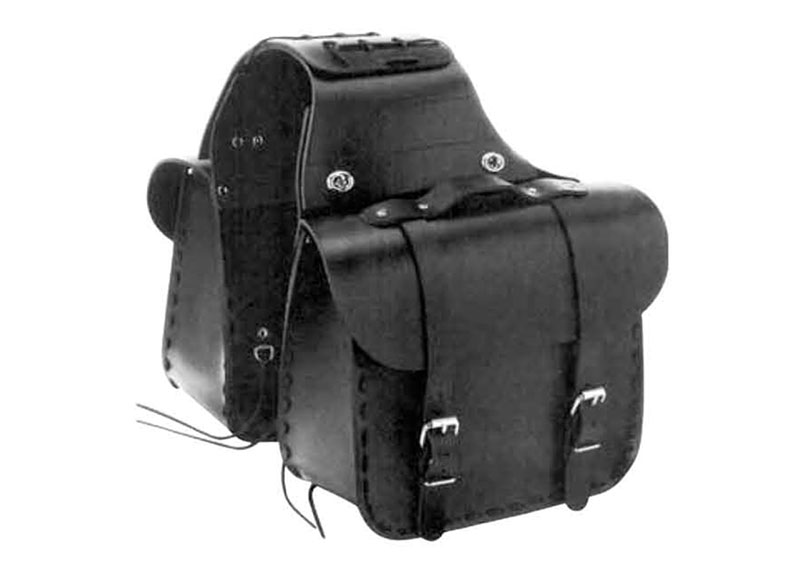
机车包