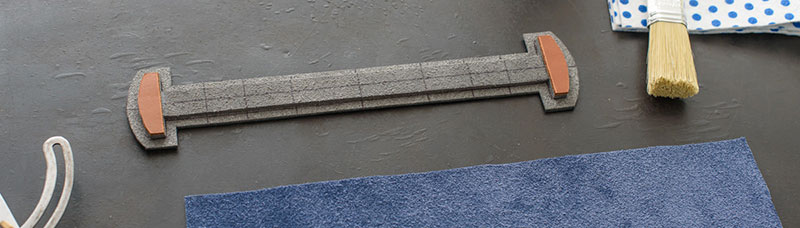
麦青';?>

首页 / 免费教程

信封包和公文包的结合体(制作过程)

By 麦青 •  2018-12-27 14:49:04 •  4721次点击
Collaboration with MFA member on a Messenger / Briefcase bag hybrid (build process)
作者:https://imgur.com/user/niniquesvk


I made a simple Messenger / Briefcase bag hybrid. Design is a result of collaboration with a MFA subreddit member.
Front leather is from soft Vache Marbre (France), pockets are from Chevre (France) and lining is from the black Nappa (Italy).
Bag has painted edges and is hand stitched with linen thread. Together 1208 cm of combined length of stitch line (at 10 SPI).


背面 Back view.
I worked on the bag with Kevin, who came with an idea of bag that has two modes. One for a workplace official environment and second for more casual setting.
In bag it translates into two uses: top handle expanded, shoulder pad removed - like a classic briefcase.
Or collapsed top handle and shoulder strap attached - like a messenger type of bag.


Looking at various approaches to bag design from mainstream manufacturers. Center lock is obviously key part in the distinction between briefcase/messenger.


To make the cross between both worlds, our design has a hidden palladium plated lock under the flap. It gives support to top handle and since it is hidden, bag can remain in the messenger style territory.
We agreed to make a structured, overbuild, rigid construction that can stand on its own, even when empty, but from a soft, pliable leather. That is combination I enjoy most.
Kevin set the weight limit for the bag, so I had to calculate the weight distribution beforehand.


插角口袋 Gusseted pockets
Construction started with interior pockets, that were cut from the Chevre leather. Folding lines for gussets are then creased with a heated filuetese tool and they will help to fold the sides symmetrically.


At the back, center is reinforced with the spunbond polyester, so pocket has stiff middle part,
but flexible sides.


Other half of the pocket magnet closing doesn’t use magnets, but steel. One small neodymium magnet has enough force – two made pocket uncomfortable to open. After testing various steel plates, simple 2 euro cents coin turned to have the best combination of steel mass and diameter. It’s based on a reinforced platform to prevent closure wear.


While stitching pockets to the lining, first I have done sides and then the bottom stitch line, that goes
through folded layers of mini gussets. Neodymium magnets are matched to the opposite position of the
coin in the pocket and stitched with the similar backing on the other side.


Pockets are stitched with 2mm distance from each other for better definition of the contours.


拉链口袋 Zipper pocket
Riri zipper is from the light ruthenium material and it’s installed with a brass ruler rail. I really like the rail, it helps to maintain equal distance from each side of the platform. It’s backed with a rigid cellulose stiffener to support slider movement.


Stitching holes are marked with a pricking iron and then stitched to the lining.


Leather on the inside of the zipper pocket is reinforced with an anti-tear textile tape. Stitching is
protected with an additional microfiber protector at sides, where the zipper gets most stress.


包底 Bottom
Bottom protection with the leather feet is cut and edge painted. Raised bottom panel will provide
protective clearance from the ground.


Bottom feet protectors are stitched with a polyamide thread because it has an exceptional abrasion
resistance. Going with the overbuilt theme, protectors are stitched 2 times around the perimeter


Body reinforcement
I made few tests on similar soft malleable leather. I wanted rigid structure that can stand on its own, but retain softness of the leather.
First prototype sucked a lot. But it helped me to figure out proper weight balance of the reinforcements.


Second version sucked a lot as well.
However, I made it with sort of pockets inside where I could insert different types of reinforcements combinations and test how would they behave together. This helped a lot and I discovered final setting I was looking for.


Main body is reinforced with aerospace grade, double sided carbon fiber panels (with quasi-isotropic fiber orientation with uniform distribution of strength). I lack proper equipment to cut carbon (it can get easily very dangerous - breathing carbon dust can permanently damage your lungs), so I used heavy utility knife. Carbon dulls edge easily, so blades with a titanium edge had to be used.


Panels are padded with thin Alcantara material. This helps to separate leather from the cold carbon and
retain its unique hand. Sides of the panels are treated with a flexible rubber compound that creates
round edge – to prevent damage of the leather over time near the sharp carbon corners.


Reinforcement composites prepared before are now positioned on the main body.
For future, in case bag will get modified or repaired, bag has hidden schematics of the construction. It will be first thing to see after detaching lining from the body, so potential repairs can be carried safely without any unnecessary guesswork.


Similarly, lining composite is finished with all the compartments installed and it’s ready to be installed to the main body.


角撑板 Gussets
Gusset shoulder strap holders are cut against the template. Then they get creasing lines along the edge
and stitching holes markings made with pricking irons.


Second reinforcement is positioned – security polyamide webbing. Metal D rings are then placed over it and holders are folded.
Holders are temporarily stitched together, so they hold the shape. This allows to paint the edges before holders are stitched to the gussets.


Gusset panels are cut and on the back, two layers of reinforcement are installed to prevent stretching
under the load. First layer is a Kevlar coated with rubber and second one is a soft microfiber.


Holders are then stitched to the gussets. Three stitches in the middle and top stitch line are wider
than the rest of the stitching, because they go through the thick webbing inside.


Reminder to not hurry with sharp tools.
I was trying to finish the last gusset in a hurry and I scratched the leather with awl. Whole holder had to be made from scratch and painted again.


Closure hardware
Main closure prongs and chicago screws that hold handle support were painted with an anti corrosion
coat to minimize chance of rusting in the years to come


After drying, closure part is attached to the body and secured through the carbon panel.

信封包  公文包 

2 回复 | 直到2024-04-20 13:02添加回复
    麦青  2018-12-27#1 -回复


    挽手 Top handle
    Handle base is made from the multiple cellulose/microfibre/latex reinforcements and padded
    with the Barenia leather at both ends for more resistance against the pull.


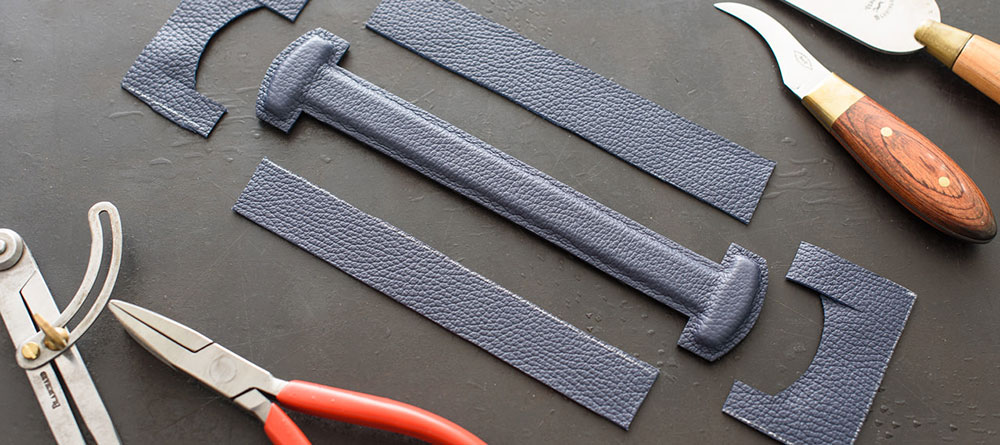
    Top leather was then molded over the shape of the handle and trimmed. Edges got painted
    in multiple layers and handle is stitched together.
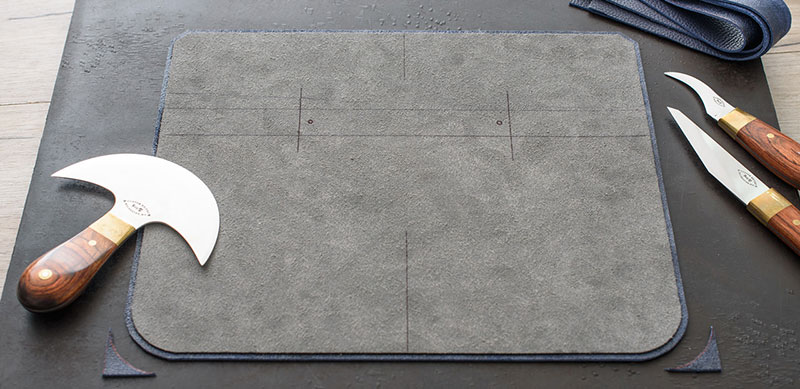
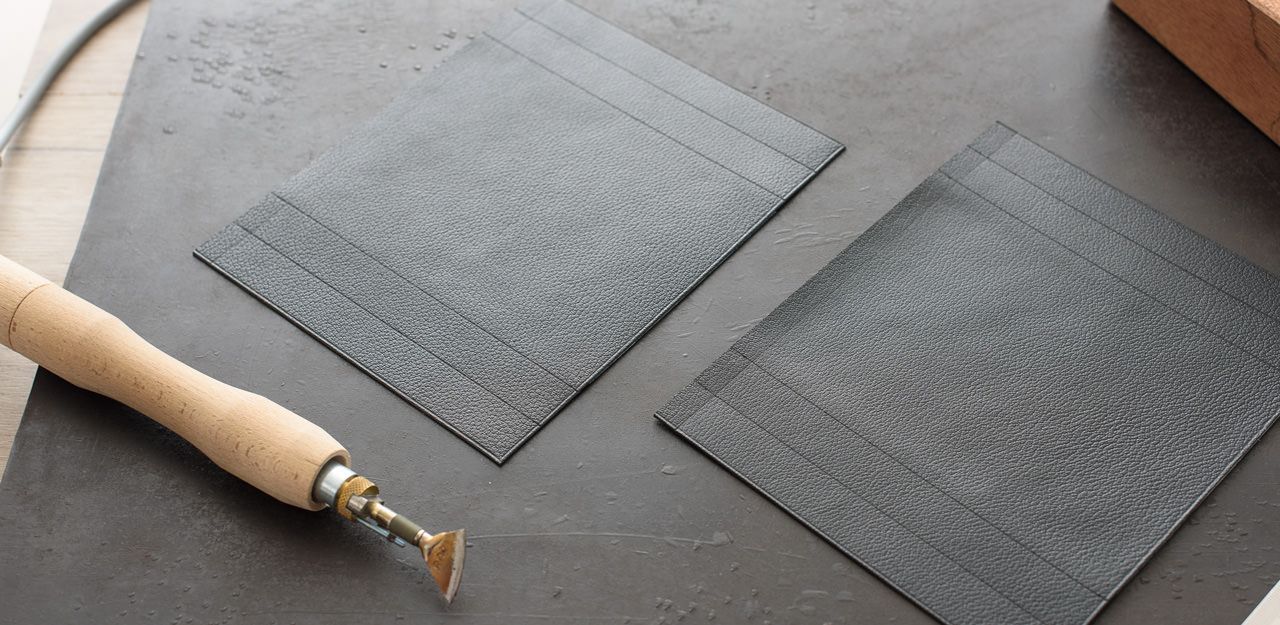
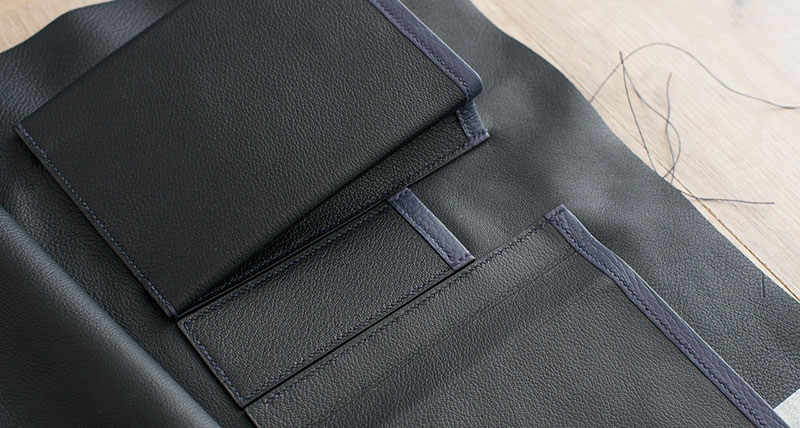
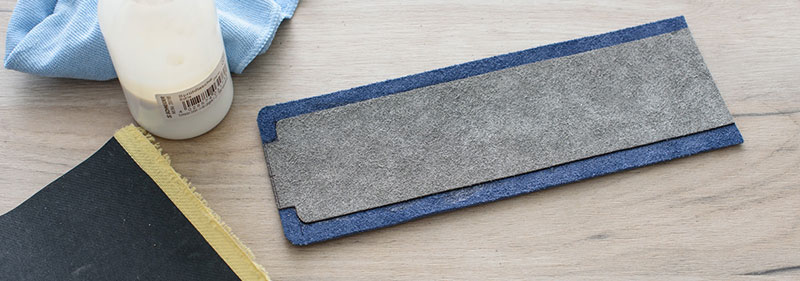
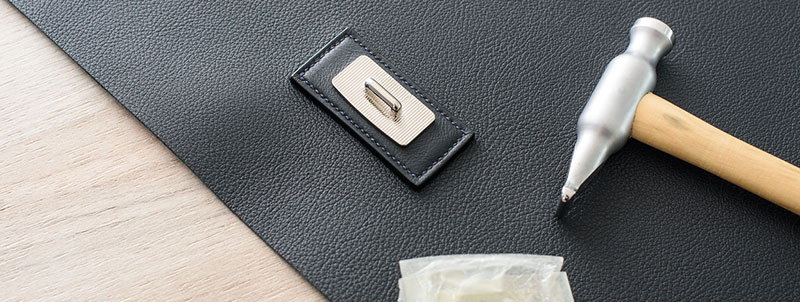

    包盖 Flap
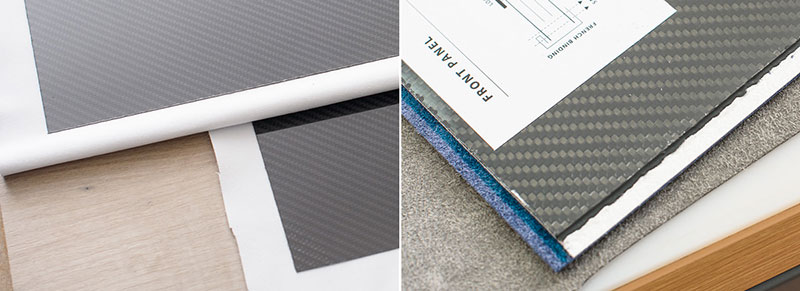
    Flap is cut and glued to the first layer of internal reinforcement. Tricky part was to cut exactly 3mm from
    the edge of the reinforcement, so the flap joined with the lining won’t have too thick edge.


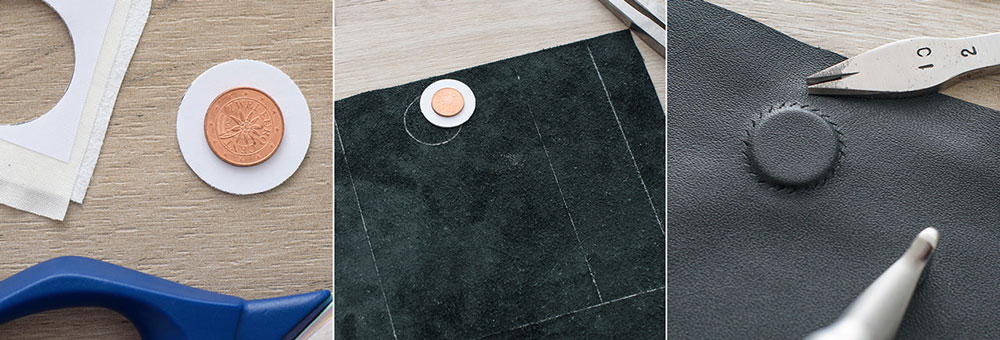
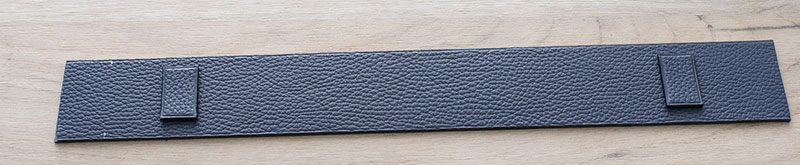
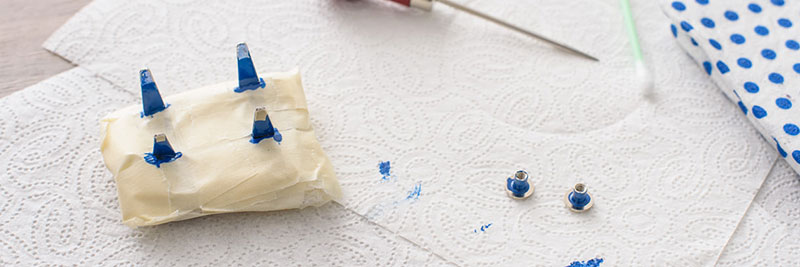
    Handle holder holes are prepared with an oval punch, together with centered holes for support bar screws.


    I hate painting inside edges of the holes, it is a slow and tedious process, since paint can spill quite easily
    to the leather and damage it permanently.
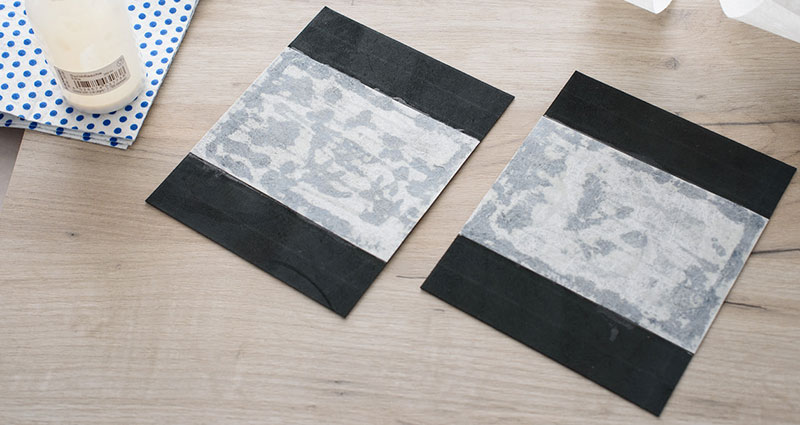
    Support bar will keep the rectangular shape while carrying the bag with the handle. It’s hold with two
    chicago screws and it’s covered in a textile tape to soften the edges.


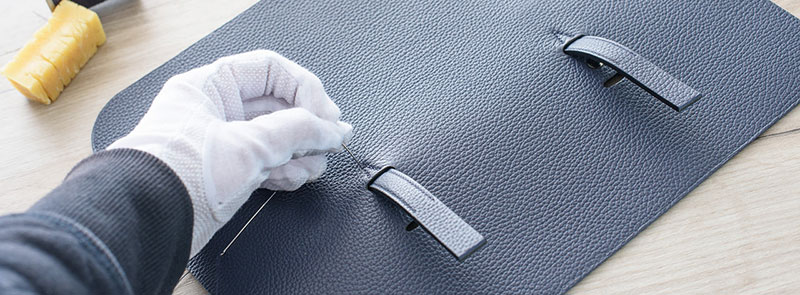
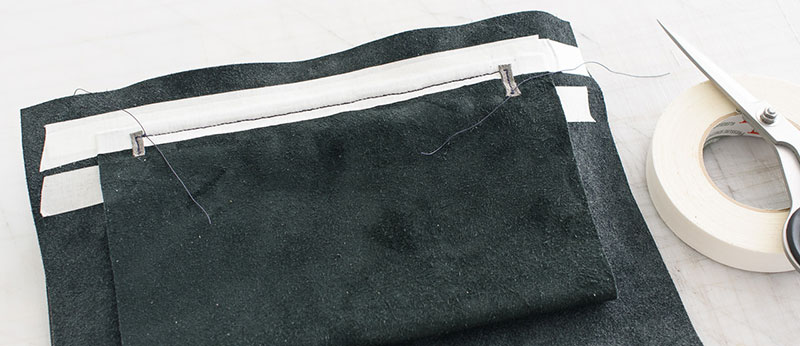
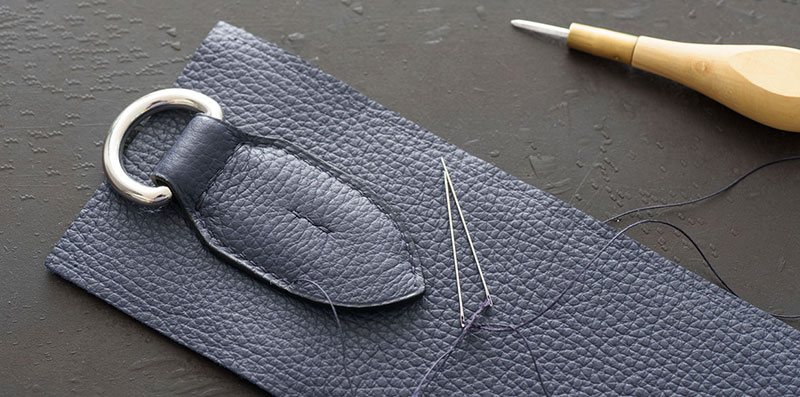
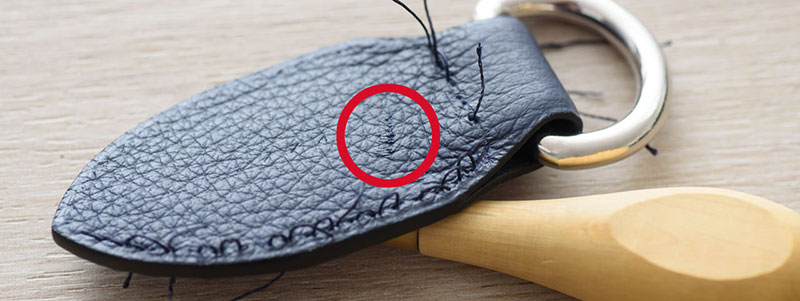
    Stitching handle holders to the flap. Because they will hold the bag weight with a relatively small
    surface, they are reinforced with Kevlar sandwiched in microfibers.


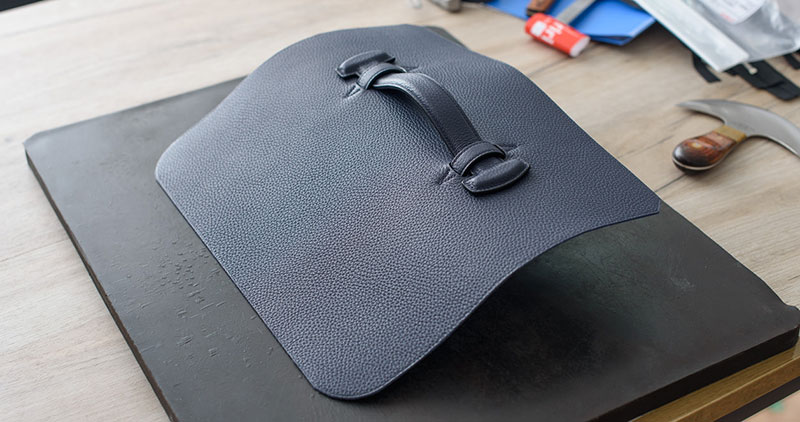
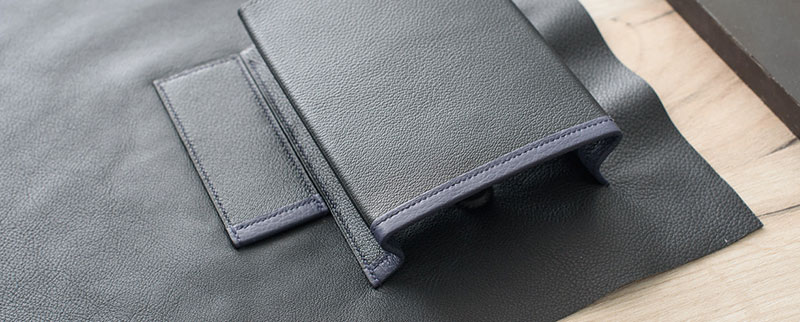
    Handle is attached in the holders. Lining will be then glued under the curve
    similar to the angle of the closed flap.


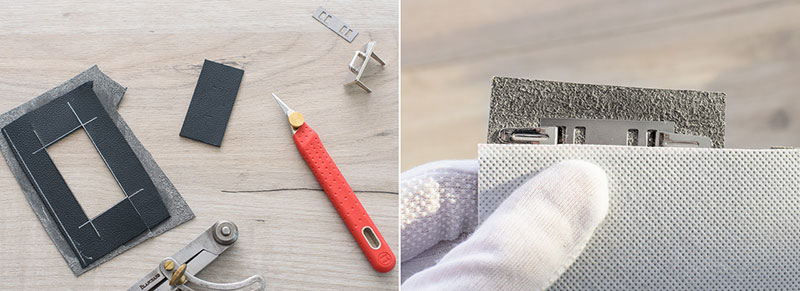
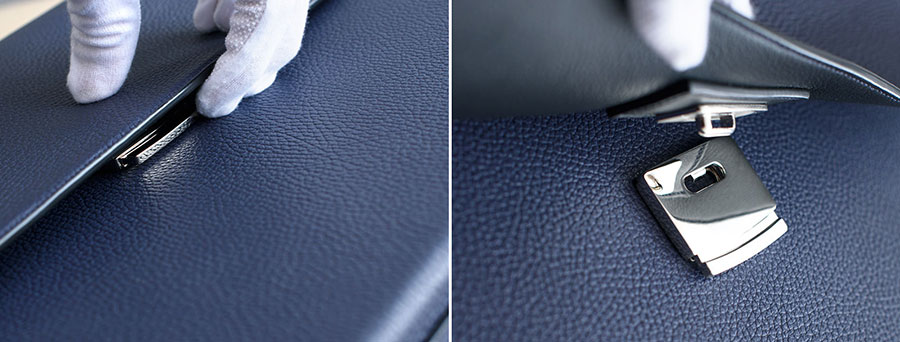
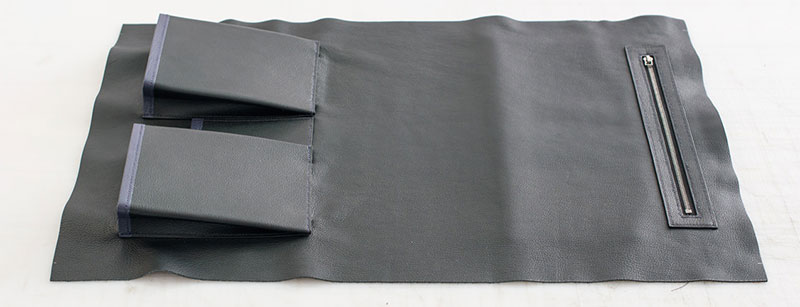
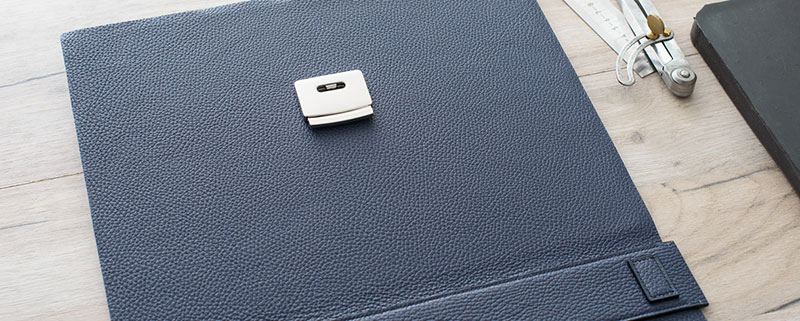
    Platform for the flap part of the closure lock is cut. However, closure has metal attaching prongs that can create bulge on the front side of the flap. To hide them, another layer of padding is glued to even the surface on the back of the platform.


    Closure platform is stitched to the flap lining only, so the stitching won’t be visible
    on the front view of the bag.


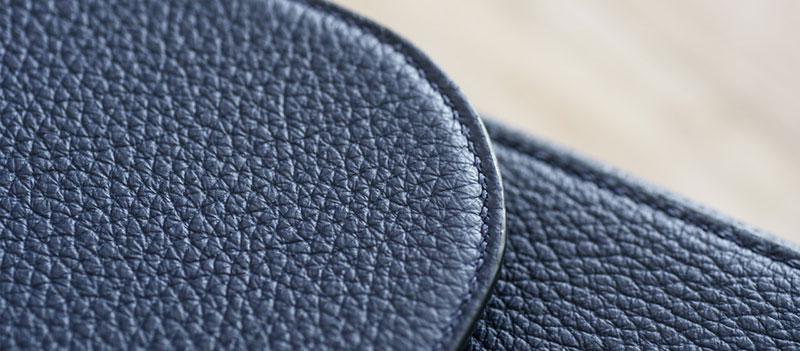
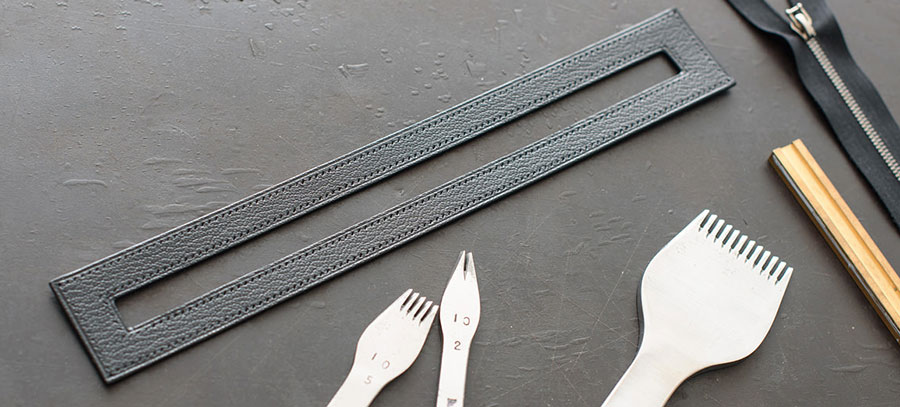
    Flap is edge painted and stitched. Stitching sits in the channel created by the 3mm shorter
    reinforcement underneath the leather.


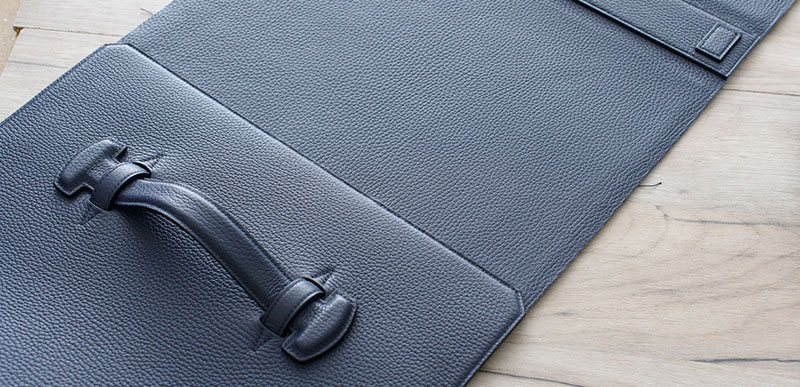
    Finished handle is then joined with the main body composite. It’s stitched before the lining, so the
    stitch line won’t show inside of the bag.
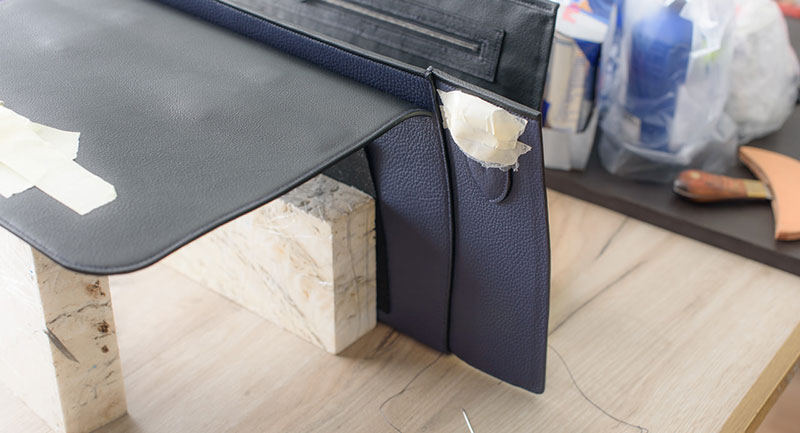
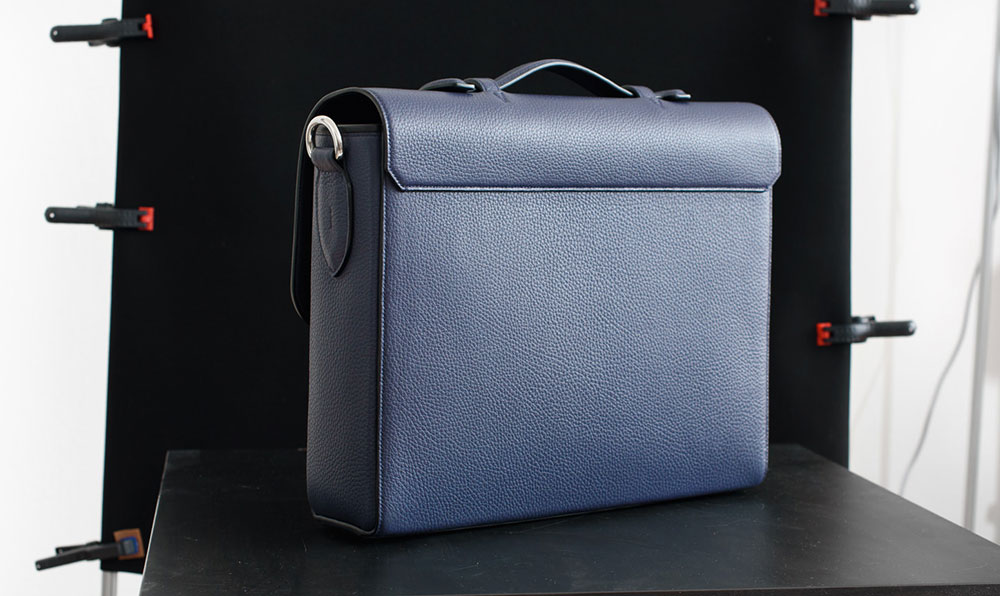

    最后组装 Final assembly
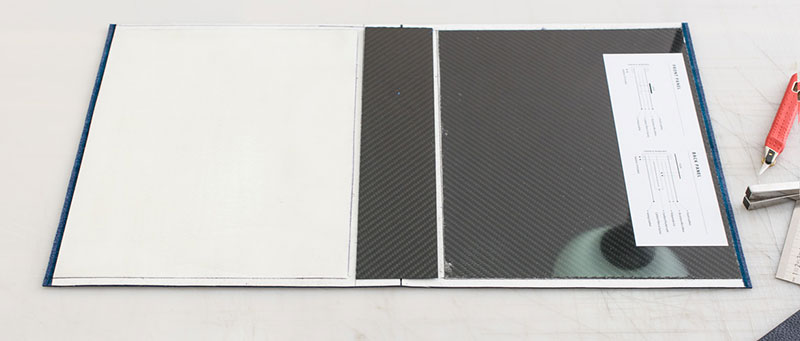
    After all the parts are joined together, lining is stitched to the front leather on both ends with a french
    binding technique, finished at the end of the reinforcing plates. Edges of the body are then painted. After drying, prepared gussets are stitched to the side of the body.


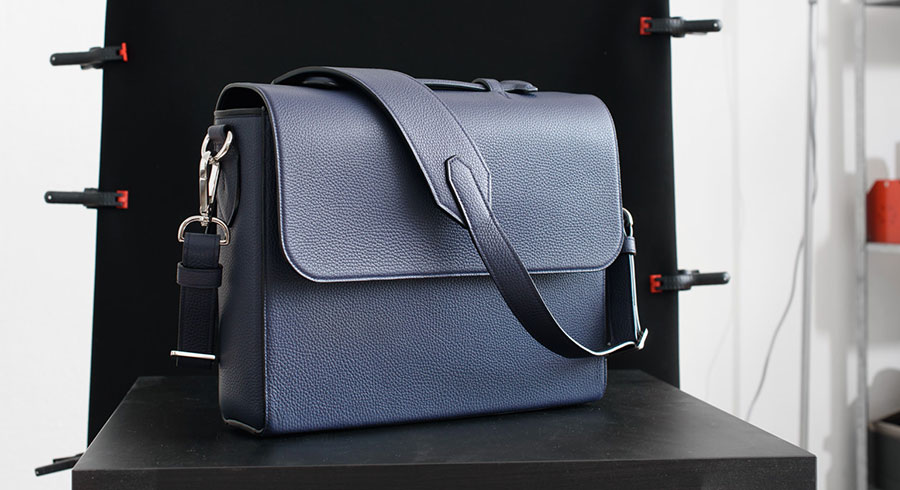
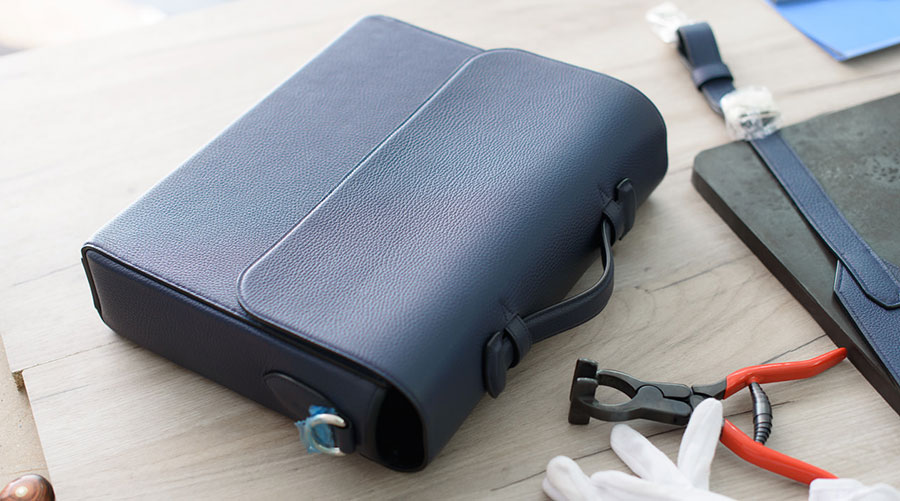
    Finished bag can stand on its own and keeps stability. Hooray.
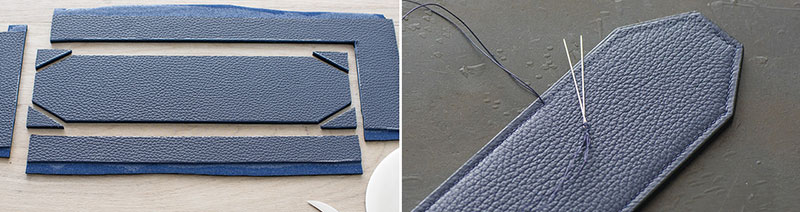

    麦青  2018-12-27#2 -回复


    肩带 Shoulder strap
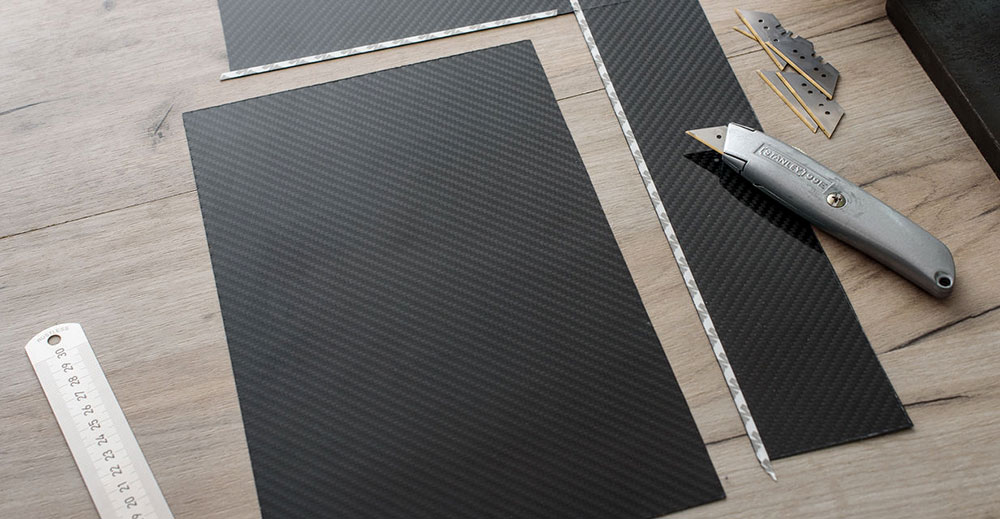
    Cutting the shoulder straps from the two layers of leather with the 500 denier Cordura reinforcement
    in the middle. Reinforcement will prevent natural elasticity of the leather to stretch the strap out of shape.
    Padded middle part of the shoulder strap has a technical suede made for performance shoes – it’s soft, thick and retains basic firmness during pressure. Together with Cordura it’s sandwiched between two layers of leather. Stitching through multiple thick layers can be challenge.


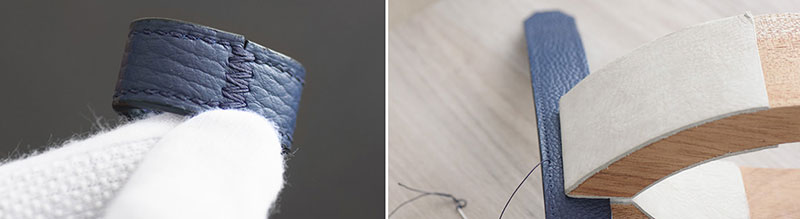
    Loops are made to keep the straps from separating from each other. In the middle ends are joined with
    a double cross stitch.
    After painting the edges and preparing stitching holes, straps are hand stitched with the installed
    palladium hardware – hooks and sliding buckles.


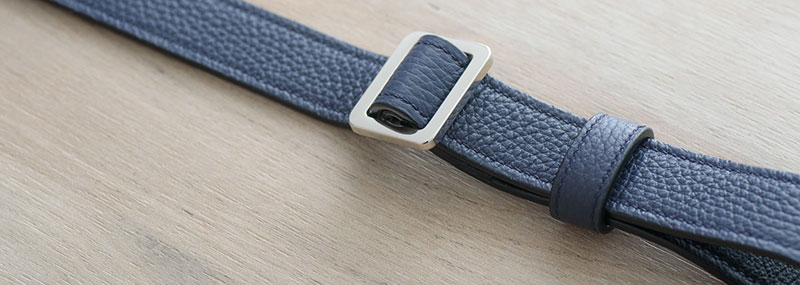
    The shoulder strap is finished. On both ends are sliding buckles, which allow to fine tune the length
    (single shoulder or cross body).


    As a last step, I filled the bag with air pillows and left overnight to set the leather to the final shape.
    I usually do projects with friends or people recommended to me by friends. This was actually my first project for someone I don't know and I was bit skeptical about whole experience.
    However, it turned to be really productive collaboration. Kevin had clear design vision but at the same time, he listened to arguments, so project was very enjoyable.


回复

登录发表 or 还没有账号?去注册

皮小匠

现在注册 已注册请 登入

栏目列表

免费教程 手工皮具教程

作品欣赏 手工皮具作品欣赏

知识问答 手工皮具制作知识

培训课程 手工皮具培训课程

推荐手工皮具淘宝店铺

微信公众号

皮小匠-手工皮具教程,免费分享图纸

皮小匠微信公众号
关注我们,及时查看教程

免费教程