I hope you enjoyed following along this tutorial.
图纸链接
http://www.pixiaojiang.cn/pattern/2090
清真寺灯摆件制作说明
1、Printing the pattern
A4 1:1 100%大小打印
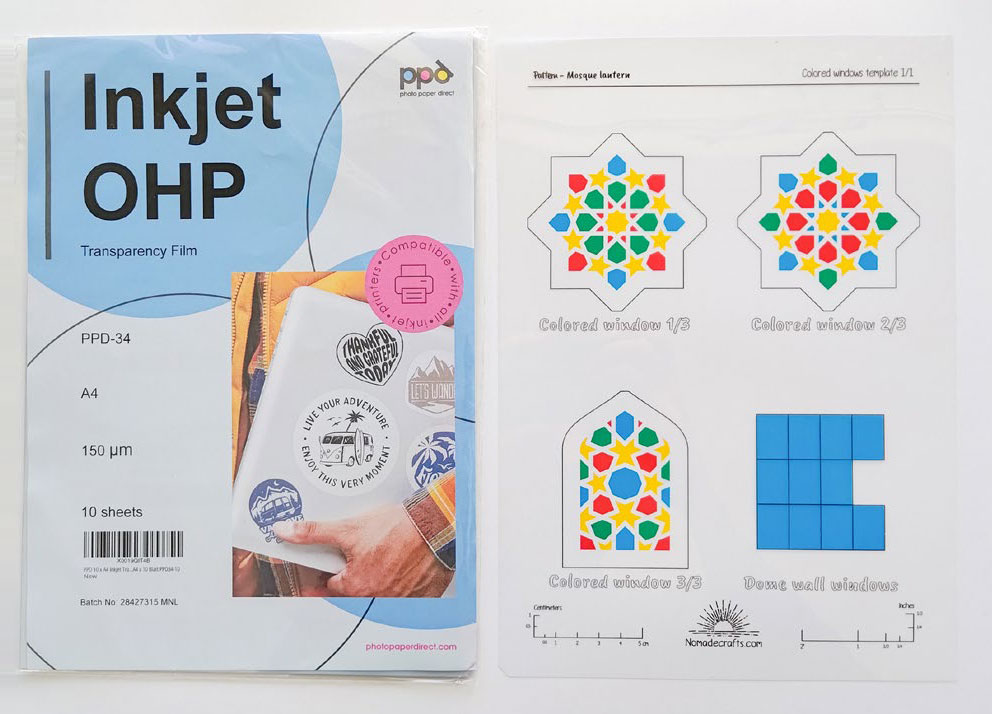
彩色玻璃用“可打印透明胶片”打印直接使用,淘宝找这个材料
As for the stained-glass windows template, print it on the transparency paper, making sure to use the recommended print settings.
Be mindful that only one side of those sheets is intended to be printed on.

2、Securing the pieces of the pattern on the leatherRoughly cut around the different pieces of the template with an X-acto knife or a pair of scissors.
Secure all the pieces of the template to your leather using masking tape.
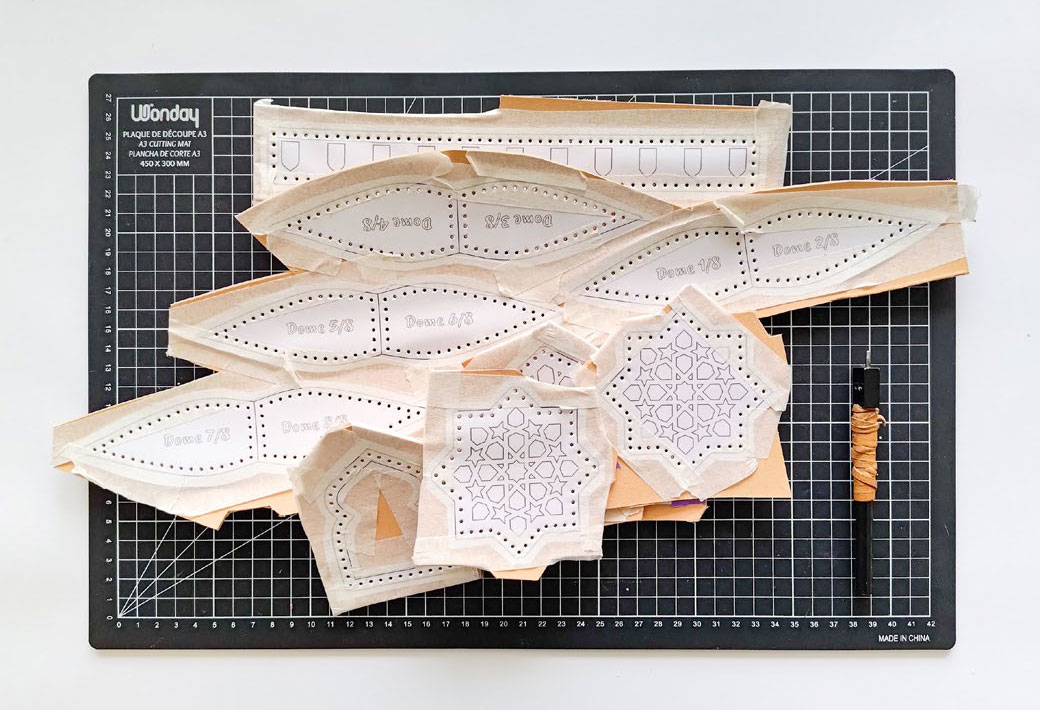
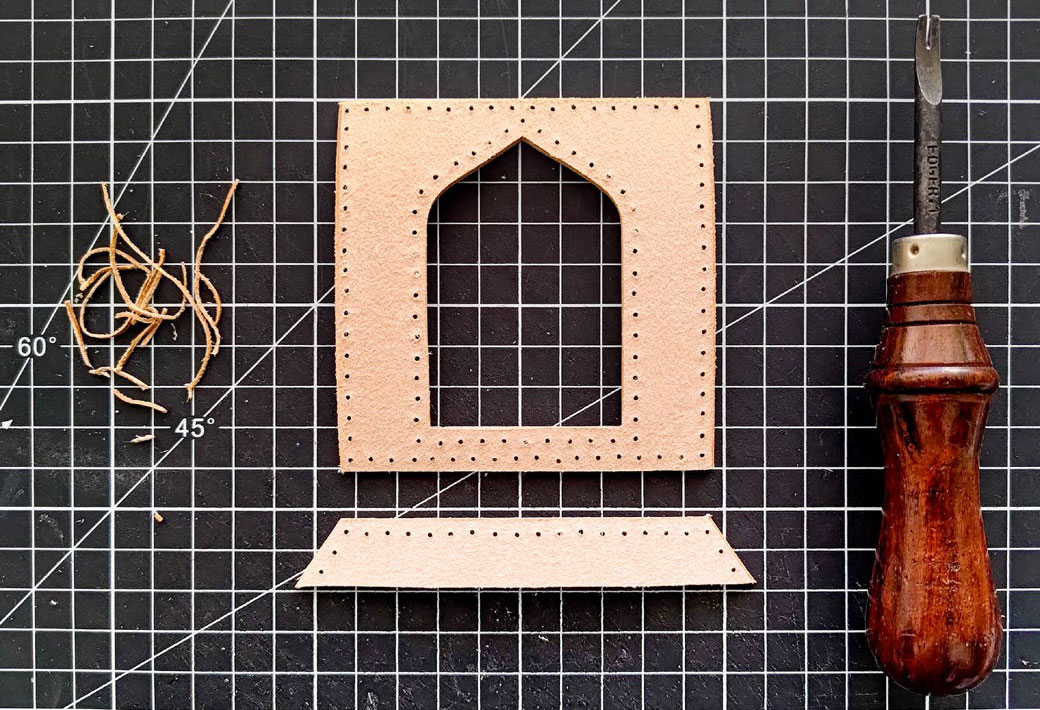
3、Punching the stitching holes
Use your stitching prongs or hole punch to punch out all the stitching holes.
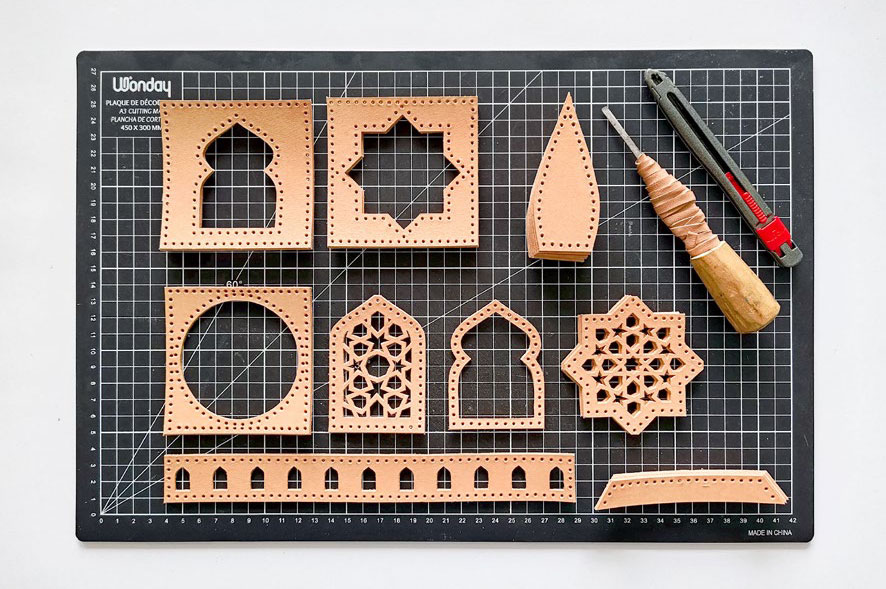
4、Cutting-out the pieces of the project
Using an X-Acto knife, cut-out all the pieces of the project.
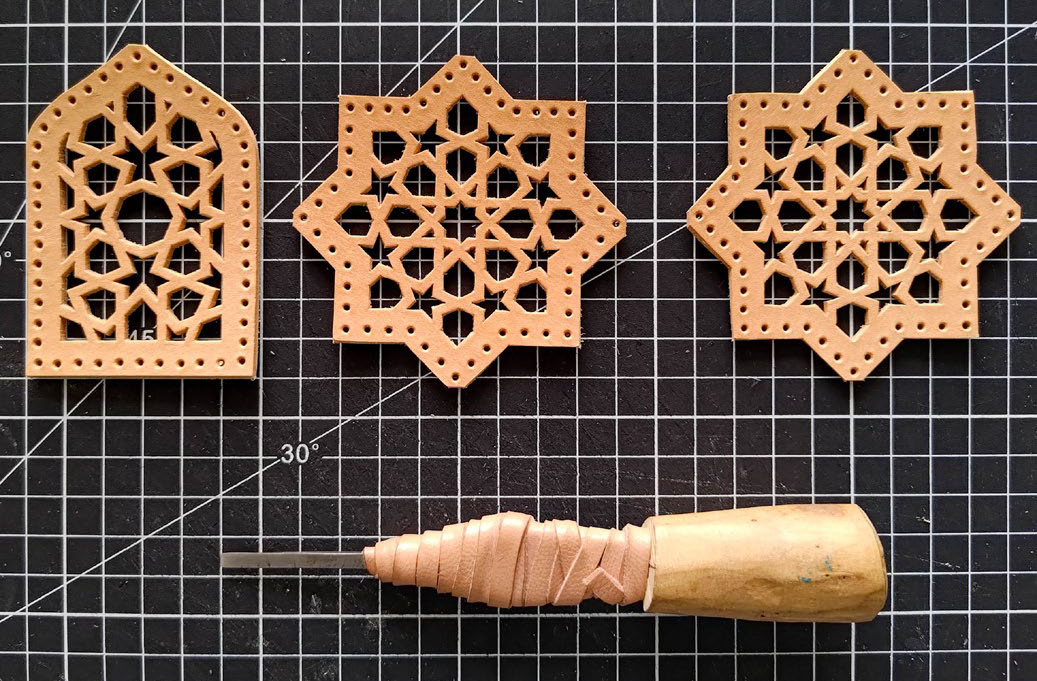
I used a lacing chisel to cut-out the small details of the window panes but I’m not gon- na lie, I really wished I had a laser cutter to use for this instead.
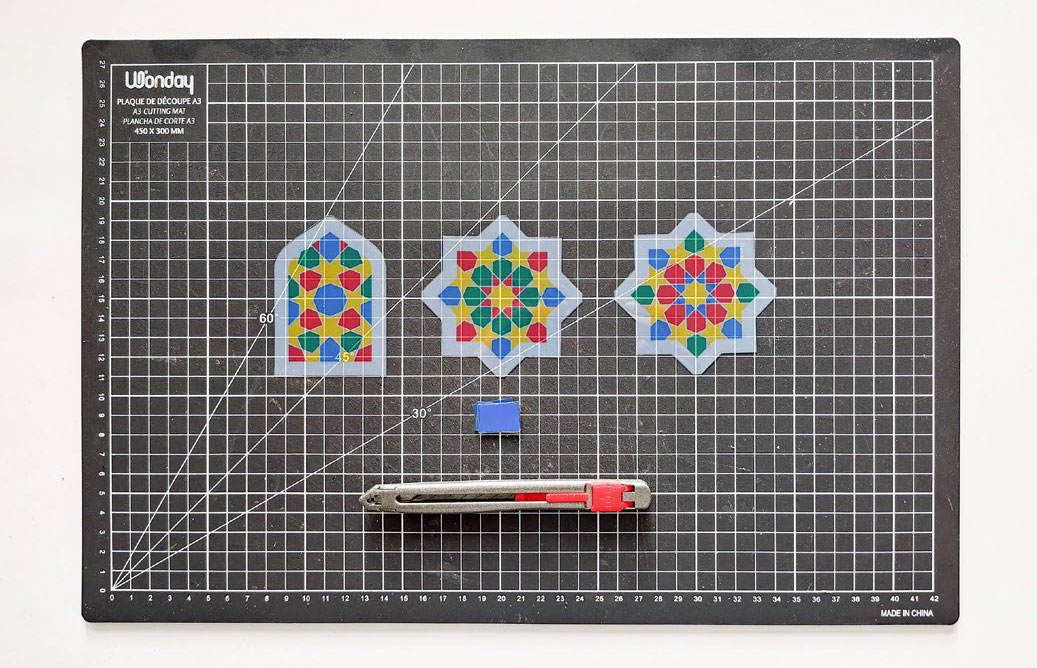
Cut-out the 3 stained-glass panels and the 11 blue windows from the transparency film as well.
5、Bevelling the inner edges
In preparation for the panels’ assembly, we are going to bevel the edges of the 4 side panels as well as the 4 foundation panels.
For the side panels, bevel the left, right and top inner edges.
For the foundation panels, bevel the left and right inner edges.
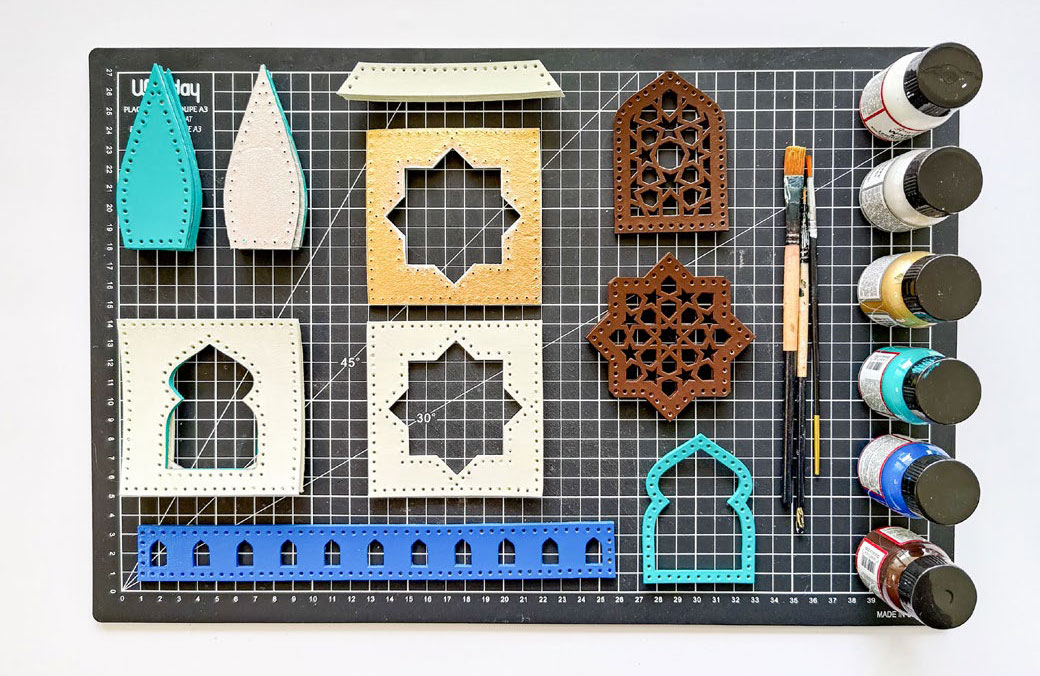
6、Painting the leather
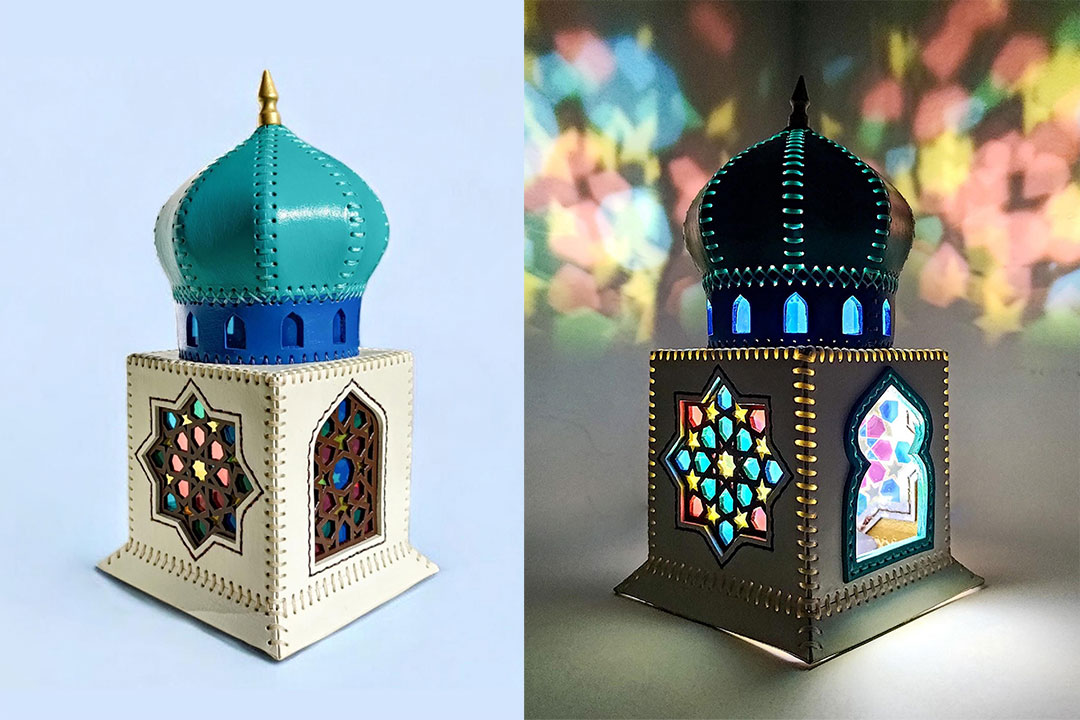
This project has been painted using Angelus leather paints.
I used a mix of white and yellow (barely a drop) to paint the exterior of the side pan- els and painted the interior gold. The window panes are painted brown, the door and the dome turquoise and the dome wall blue.
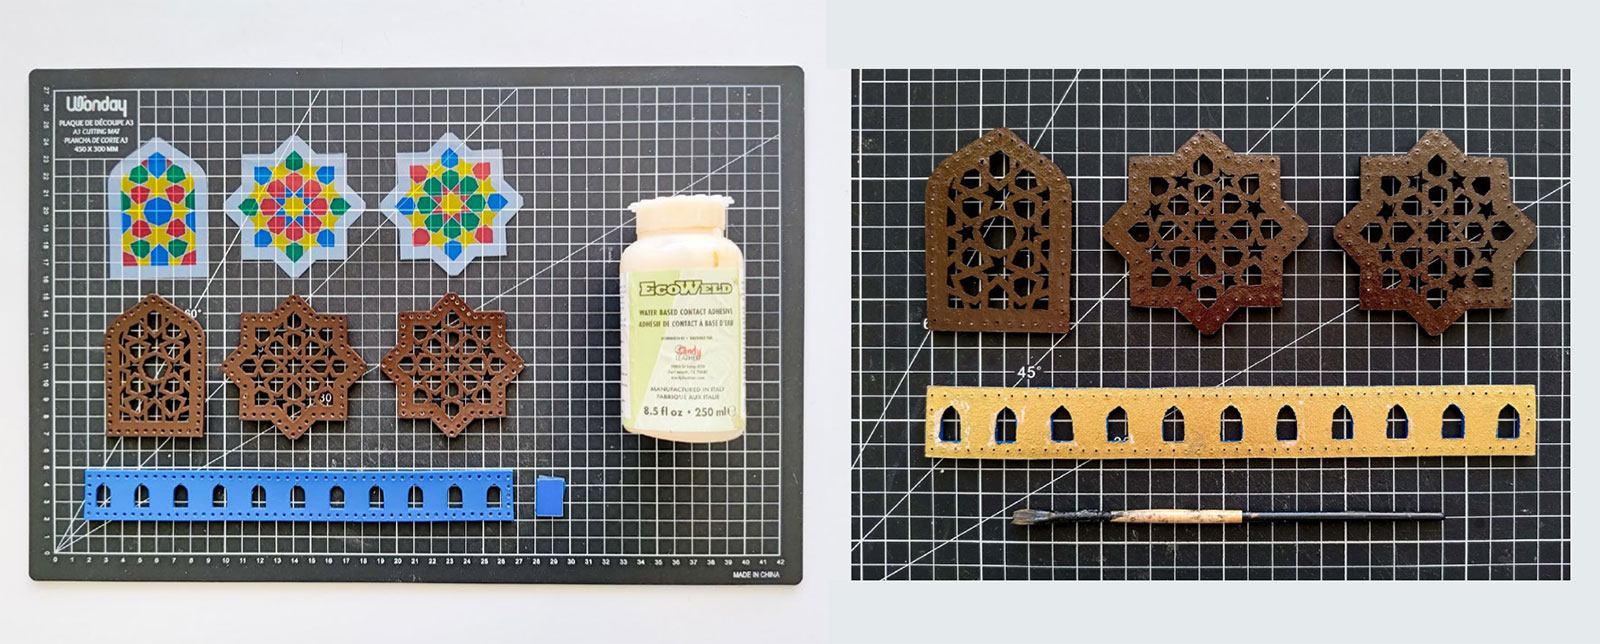
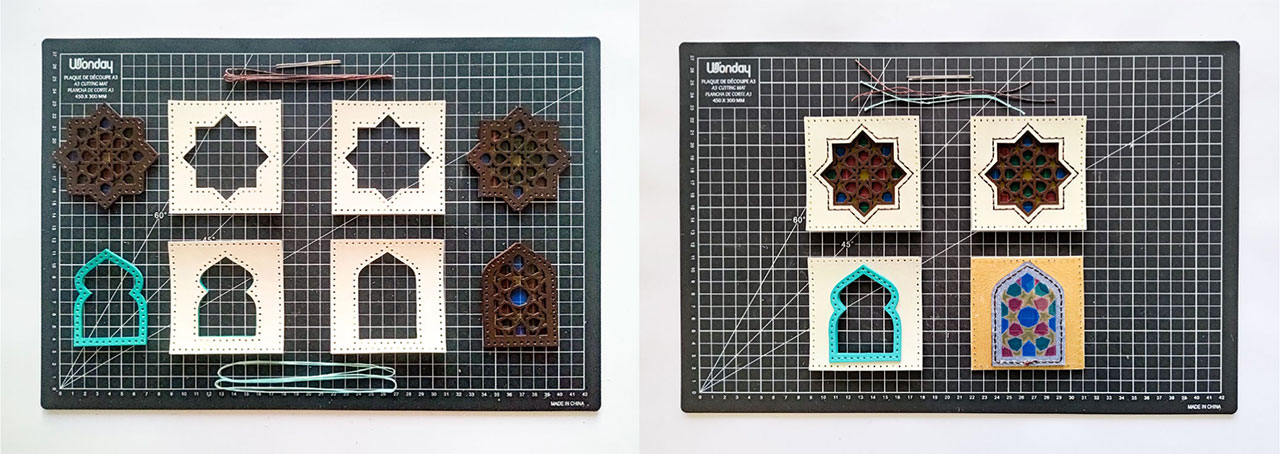
7、Gluing the stained-glass windows to the window panes
Through experimentation, I found out that the printable side of the transparency paper adheres quite well to contact cement. This makes sticking the stained-glass windows to the window pains really easy.
First apply contact cement to the back of each window pains and around the back of the windows of the dome wall. Wait for it to be dry to the touch.
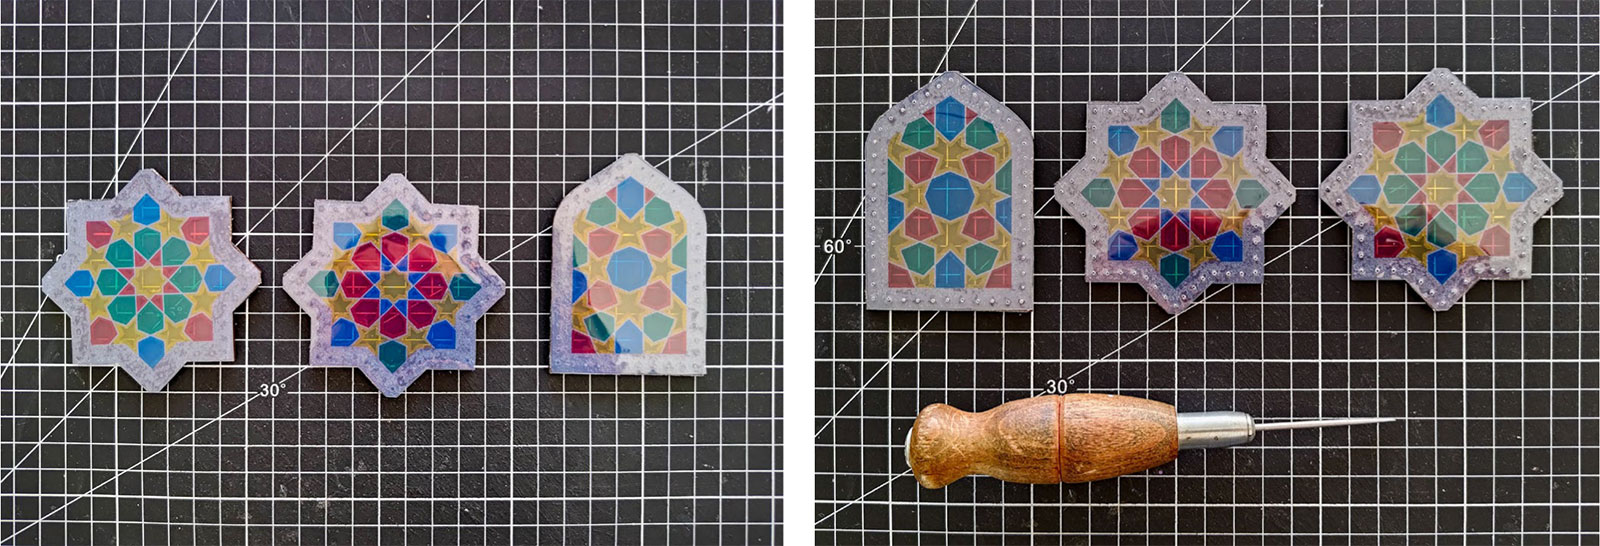
Position the stained-glass windows on top of the back of the window panes and press them firmly in order to bound the transparency film to the contact cement.
Then use an awl to pierce the stitching holes through the transparency film.
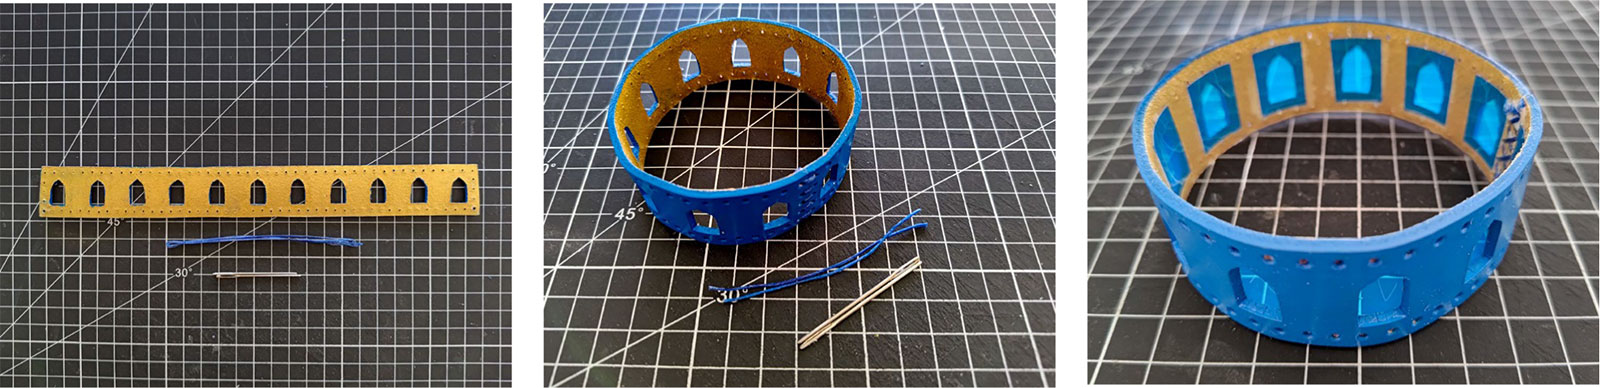
For the dome dome wall, we need to stitch it in shape before setting-up the windows. Since the strip will curve when it is stitched, the windows would crack if they were set-up when the strip is flat.
First apply the contact cement around each window on the flat strip.
Wait for it to be dry to the touch and stitch the two ends together using a cross stitch. Finally press each window into place to bound the transparency film to the contact cement.
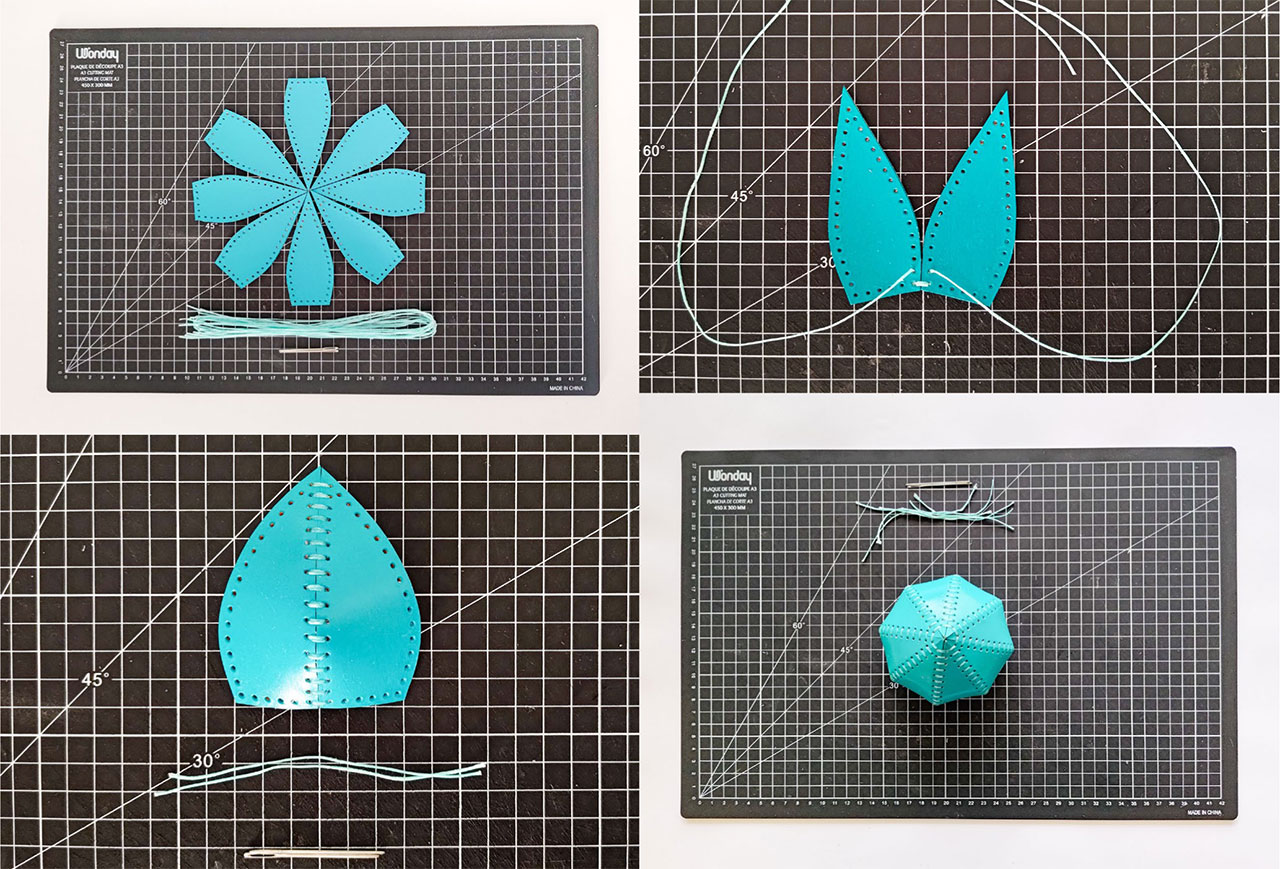
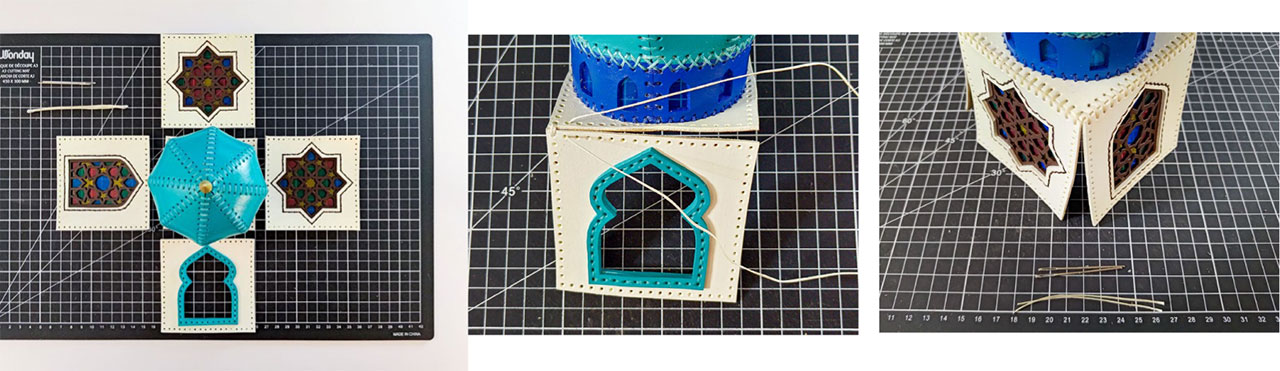
8、Assembling the lantern
Now to stitch it all together!
We’ll start at the dome, stitching each of the 8 dome panels together using a cross-stitch.
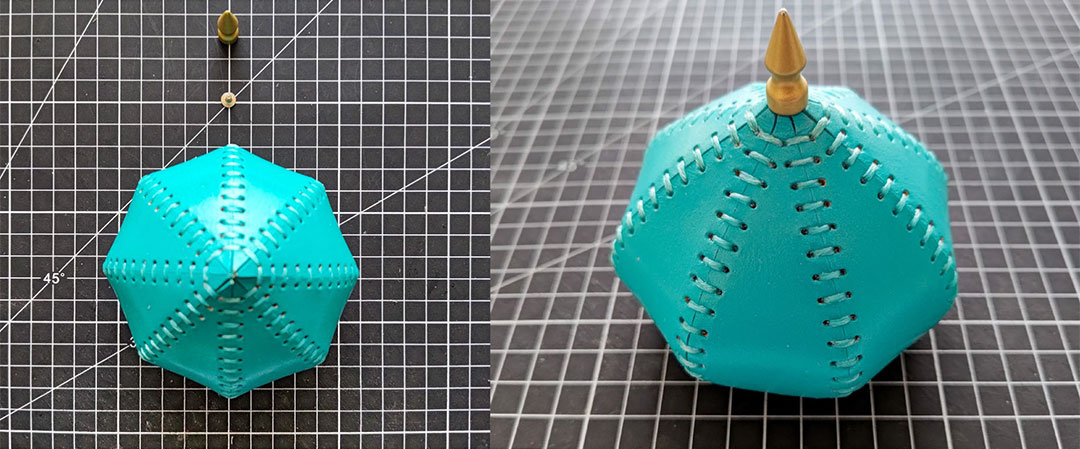
Then screw-on the top decorative spike. Depending on the thickness of the leather that you used, the screws that comes with the spike might be too short. I had to use a longer screw with a small washer to set-it up properly.
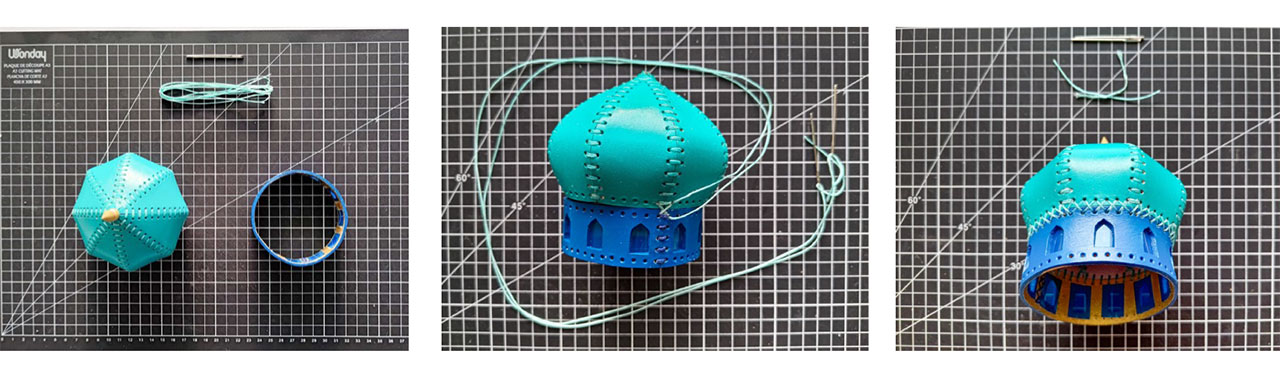
Stitch the periphery of the base of the dome to the wall using a cross-stitch.
Stitch the bottom of the wall to the roof. The technique is akin to a saddle stitch. But instead of having two pieces flush with each other, they are positioned at a 90 degrees angle.
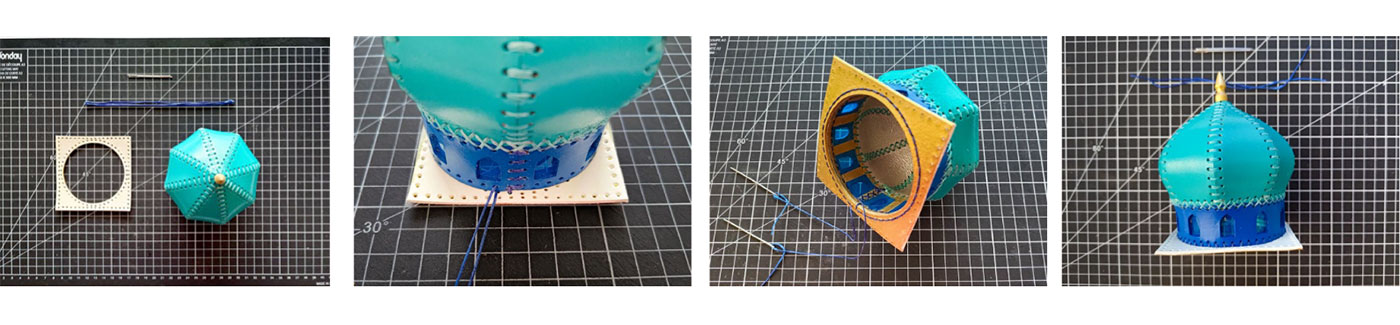
Stitch the three window panes underneath their respective side panel using a saddle stitch. Stitch the door frame on top of the appropriate panel.
Stitch the top of the four side panels to the periphery of the roof using a cross-stitch.
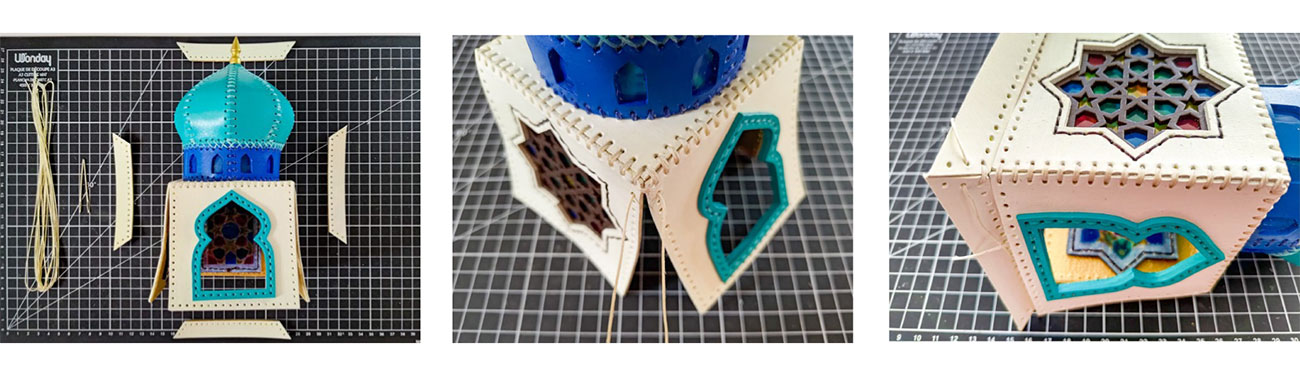
Join the 4 side panels by stitching down each corner of the lantern.
Once you reach the bottom of a corner, stitch two foundation panels together with the same thread.
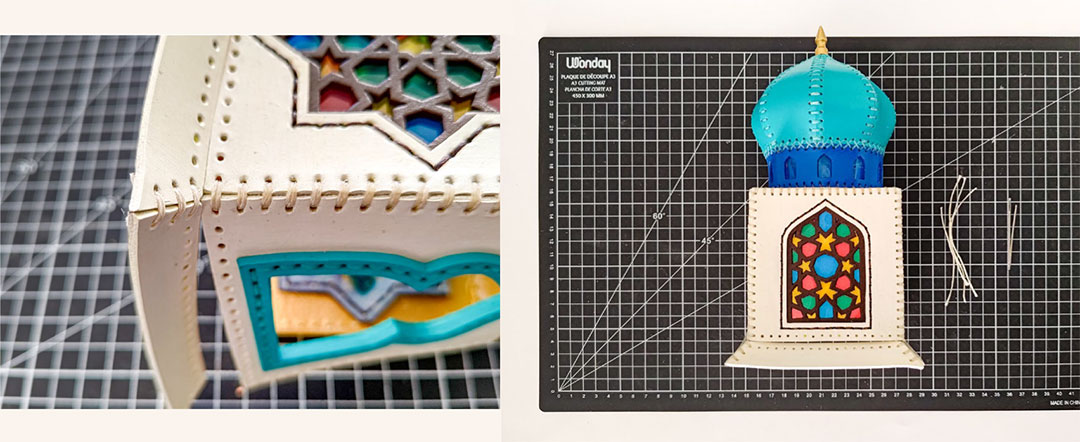

Complete the lantern by stitching the top of the 4 foundation panels to the bottom of each side panel.