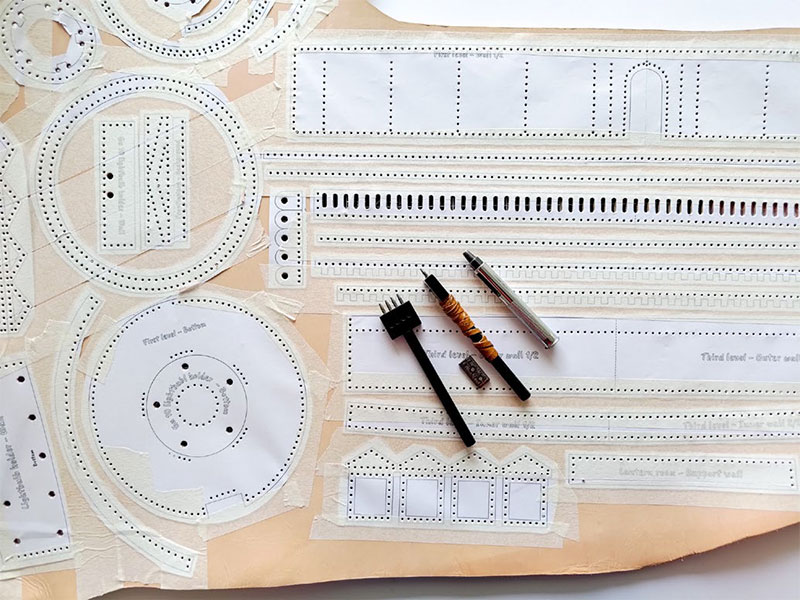
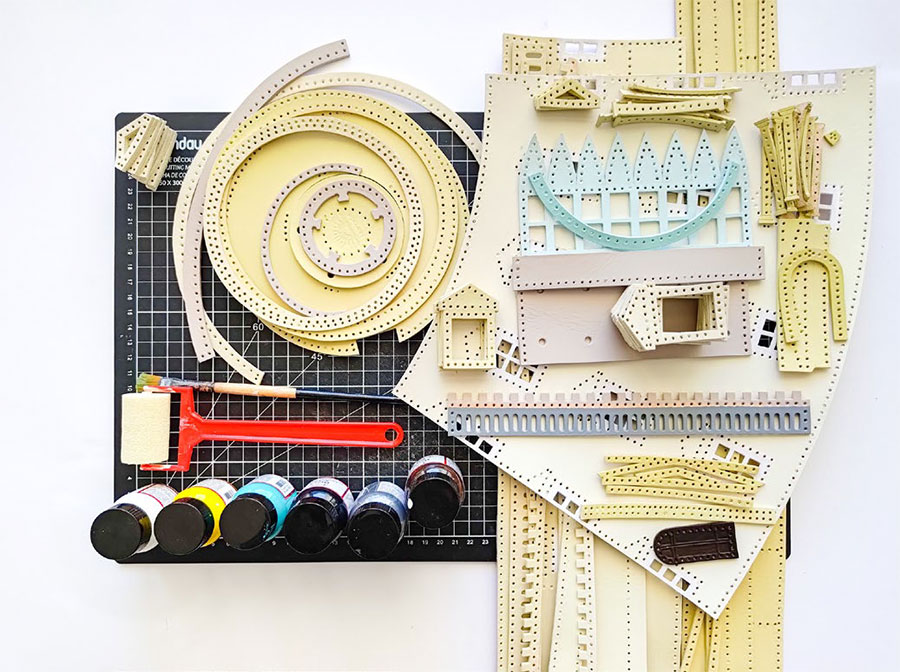
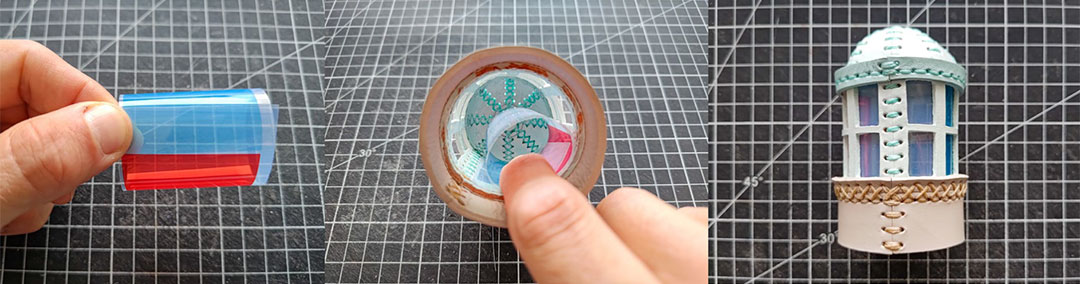

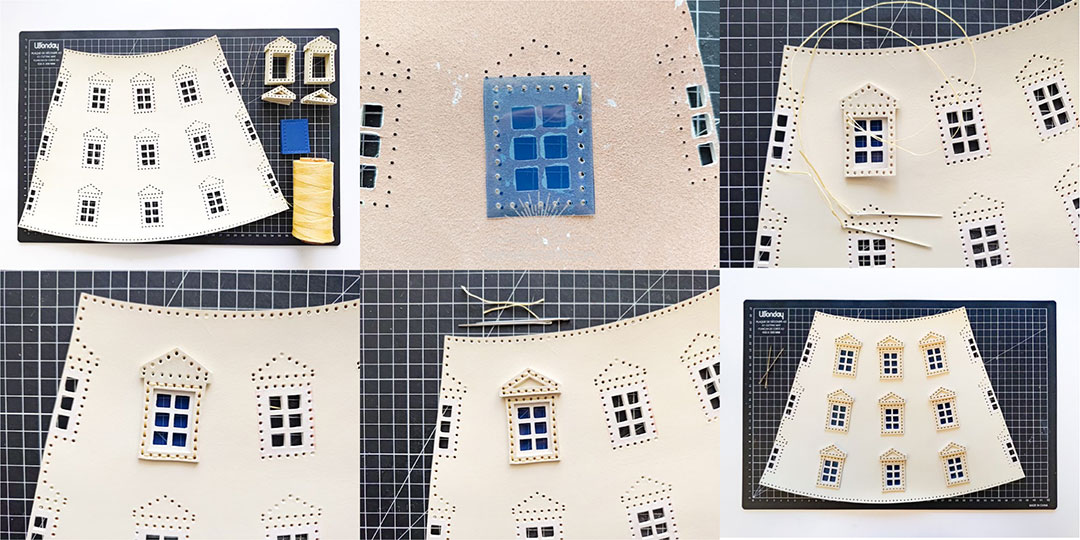
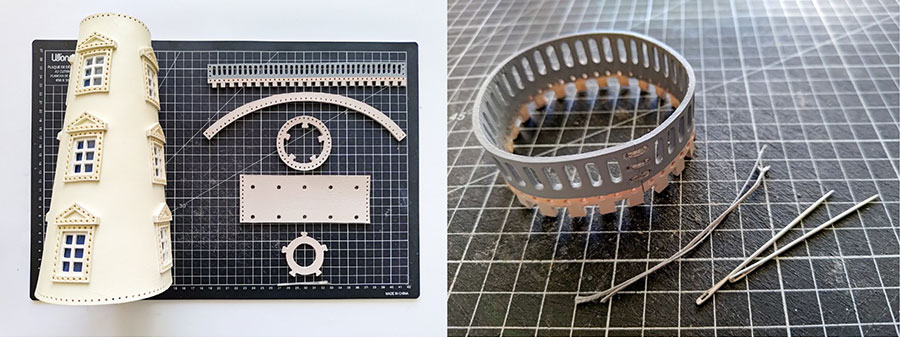
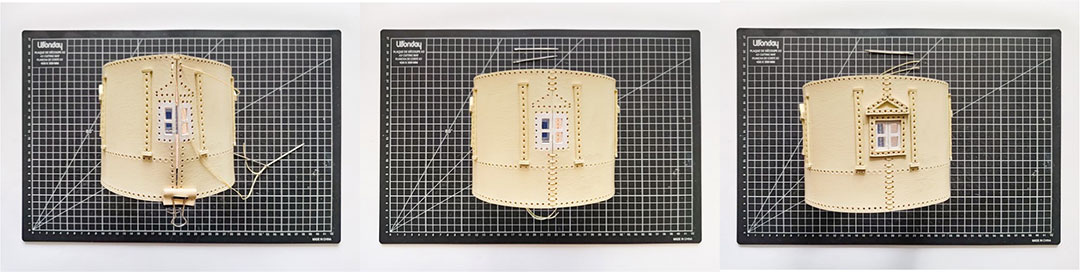
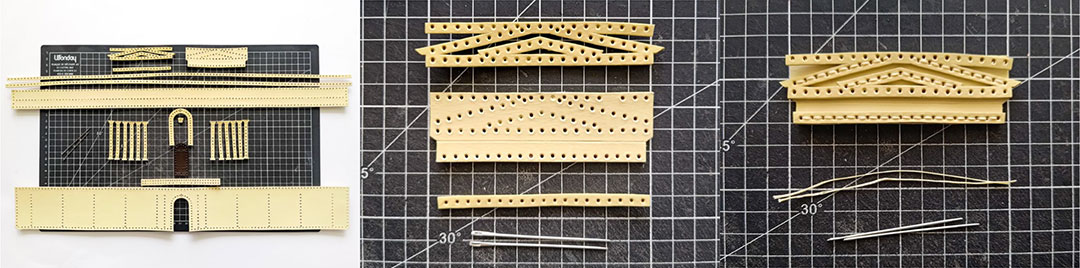
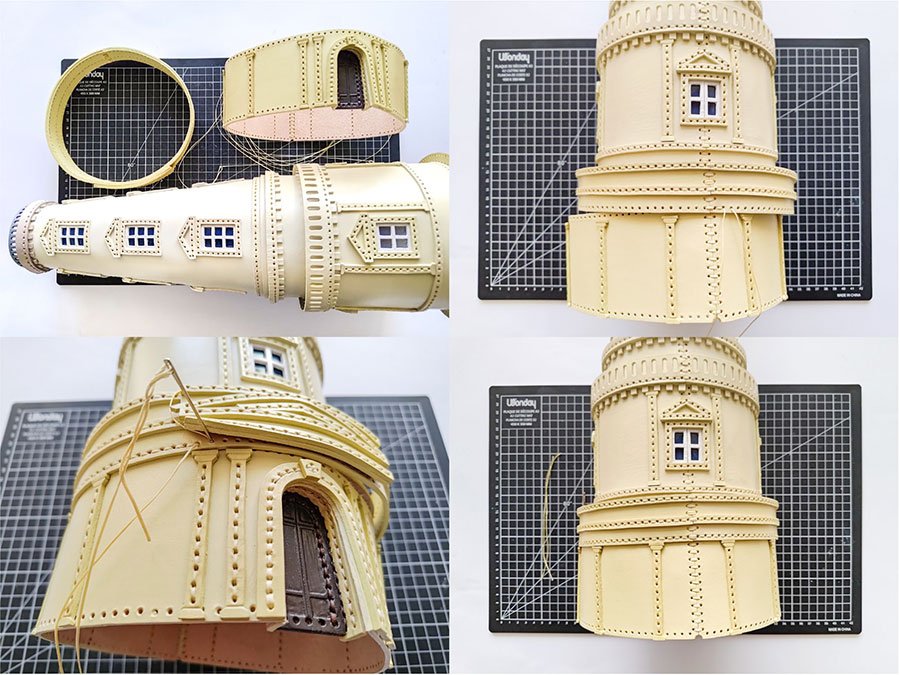
7.2、Tower
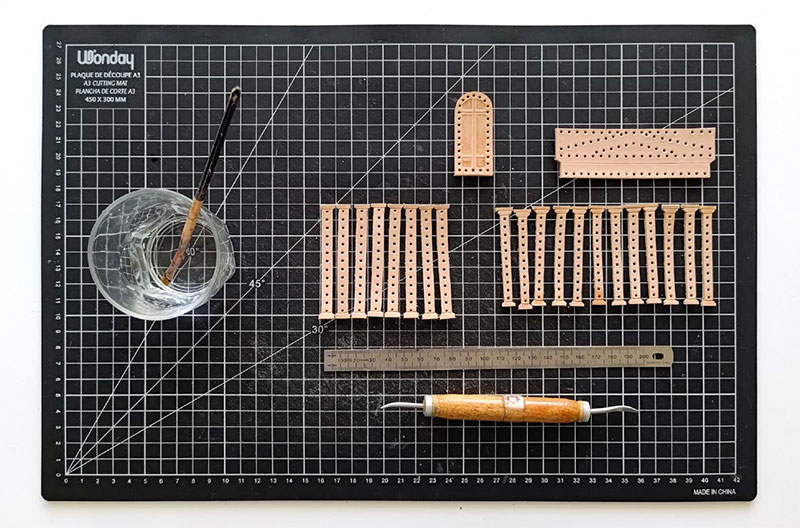
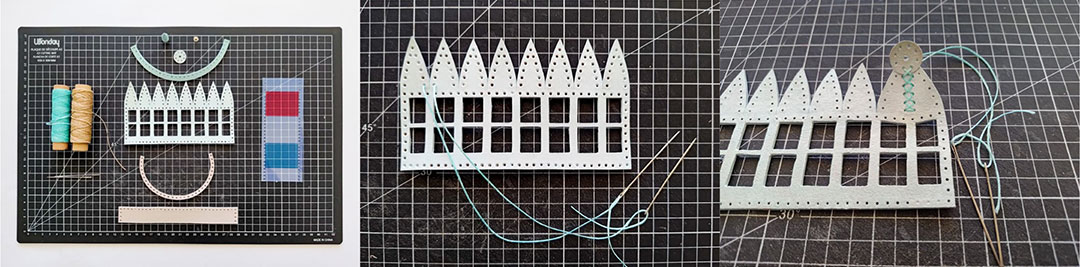
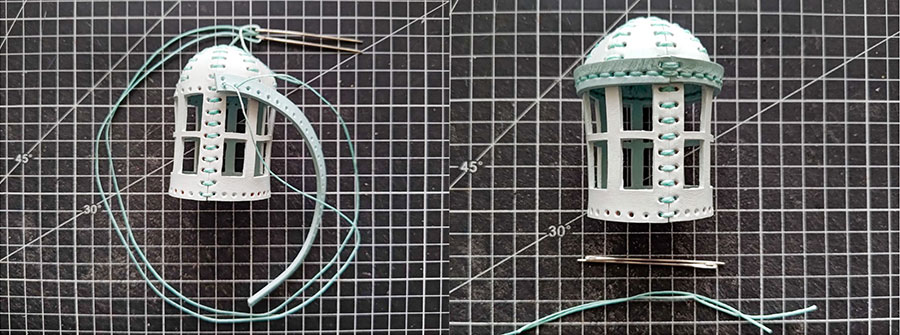
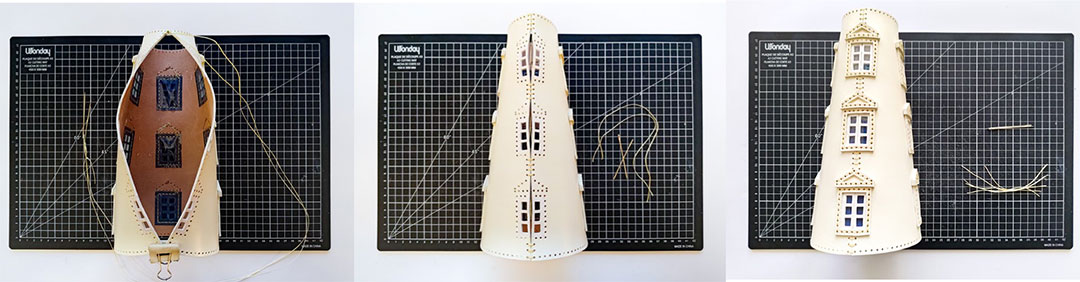
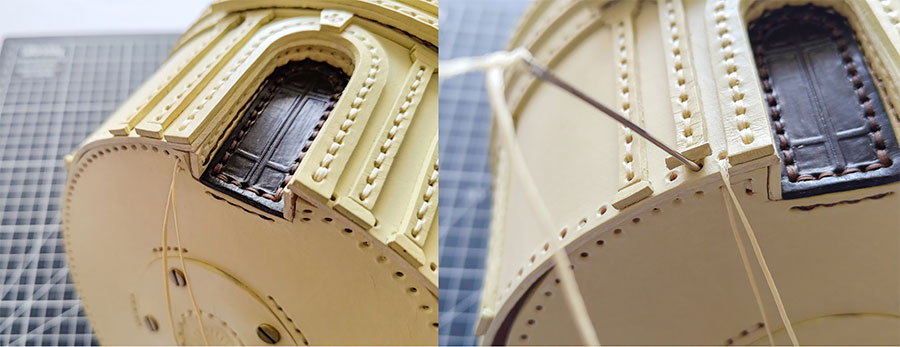
Start by stitching the 9 central windows on the tower shaft. To do so, stitch the win- dows' frames to the shaft and to the trans- parency films underneath.
Then stitch the lintel on top of the frames themselves.
You may notice that the transparency film windows are slightly less wide than the frames so that the stitching holes are 1mm off. This is because when the tower shaft is curved, its inner surface shrinks. Thus the transparency film would wrinkle if it was the same size as the layers above it.
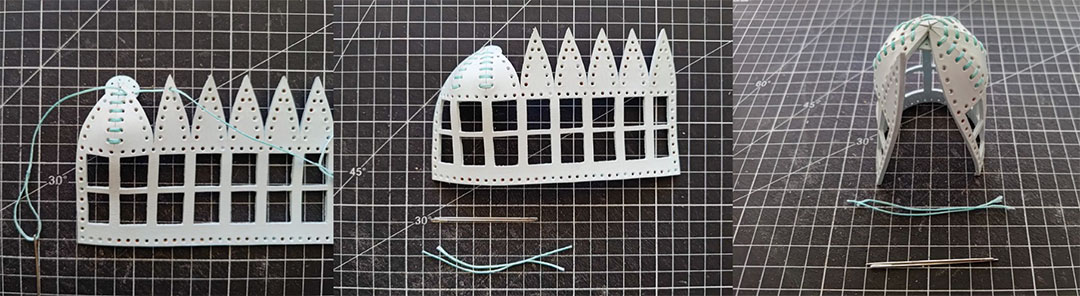
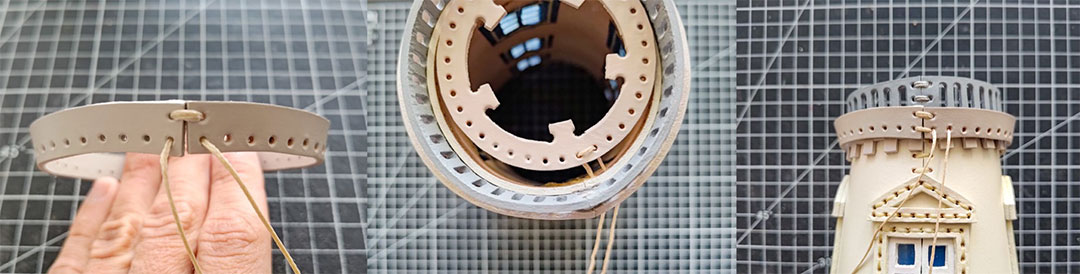
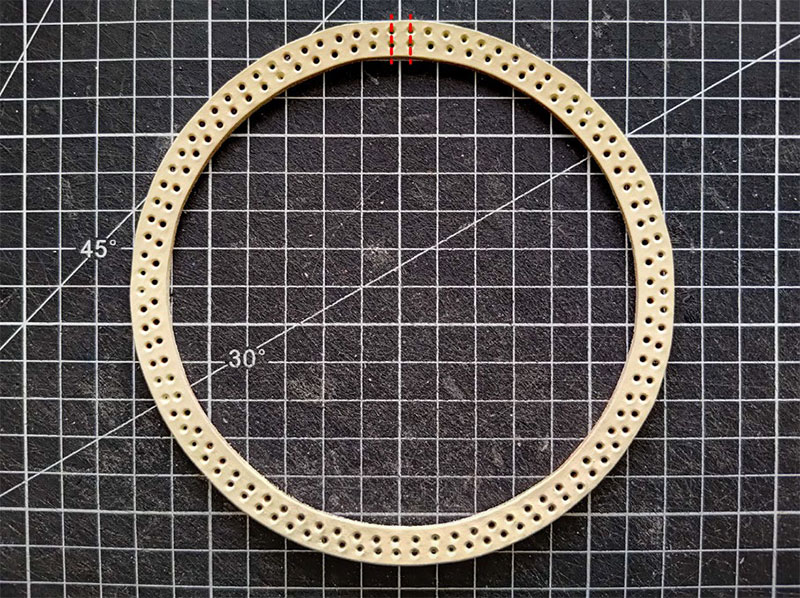
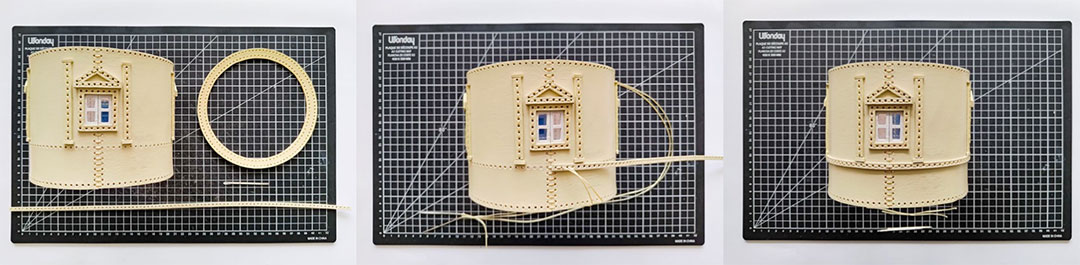
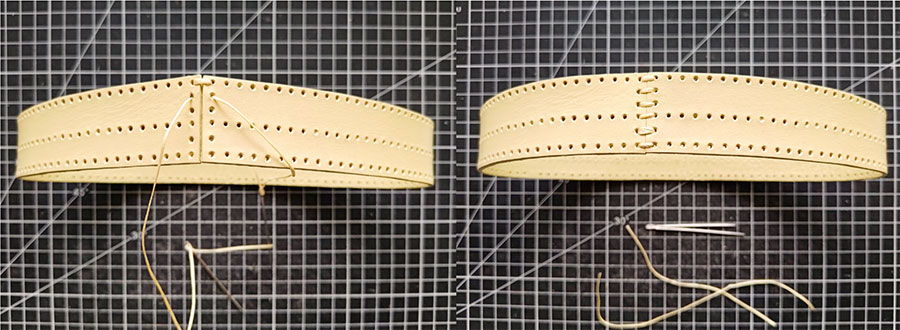
Connect the two ends of the tower shaft to form a cone by using a cross stitch above, below and between the locations of the last 3 windows (holes 12 to 13, 14 to 15, 16 to 17 and 18 to 19).
Then stitch on the windows to complete the shaft. The holes located at the center of each window do not match any holes on the shaft. Simply run your needles and thread through the gap between the two opposite edges of the shaft.
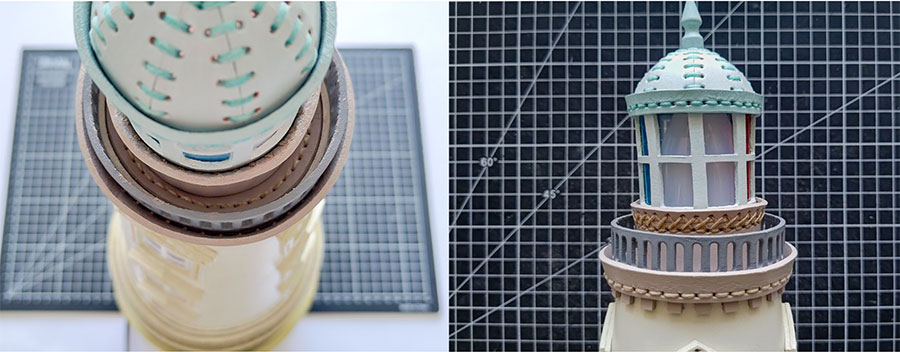
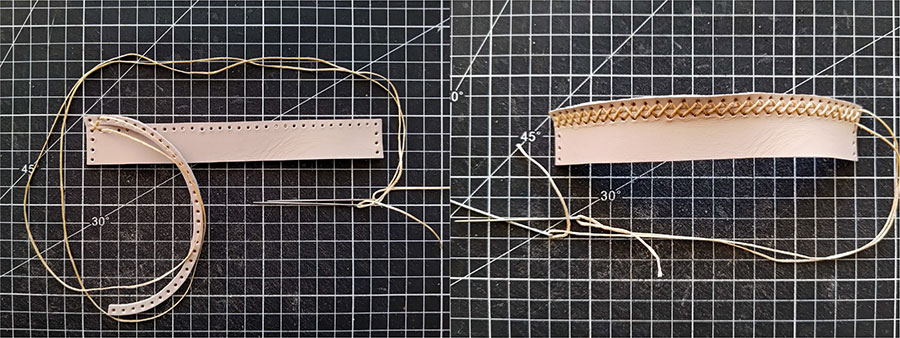
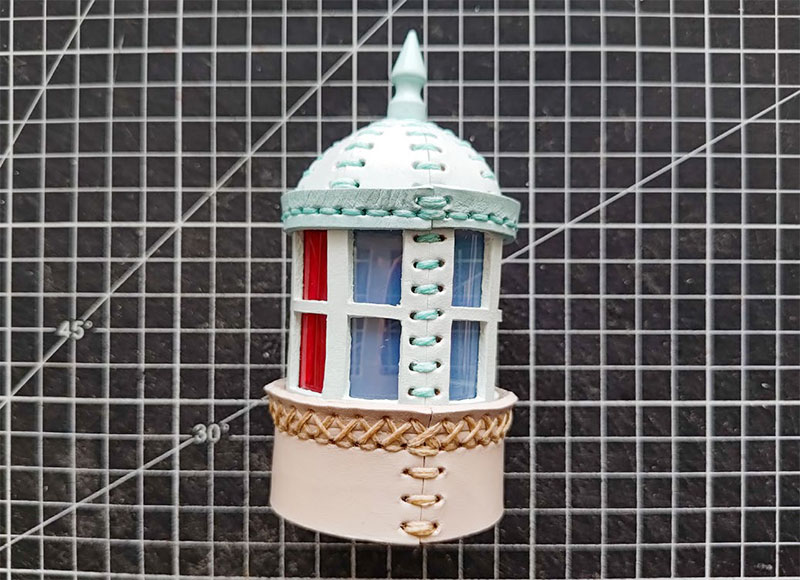
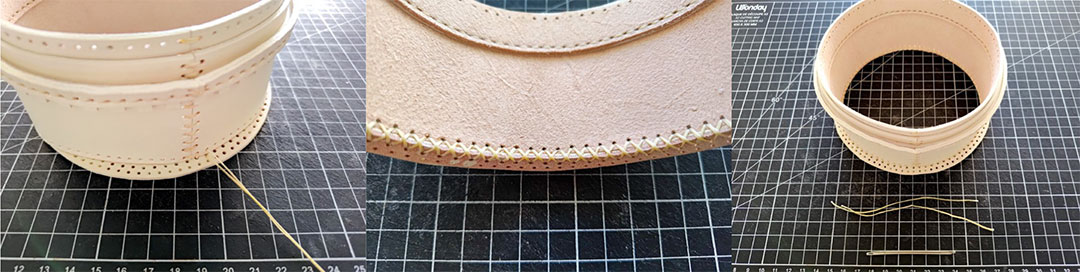
We can now add the the railing, cornice and lightbulb holder to the tower shaft. First connect the two ends of the railing using a cross-stitch (holes 20 to 21).
Connect the two ends of the cornice (holes 22 and 23) using a cross-stitch.
With the same thread, stitch together the cornice, the railing, the tower shaft and the terrace using a box-stitch (holes 24 to 25). Which means that you are going through the cornice, railing and tower shaft as you would with a regular saddle-stitch, but then the thread goes at a 90 degrees angle to go through the terrace.
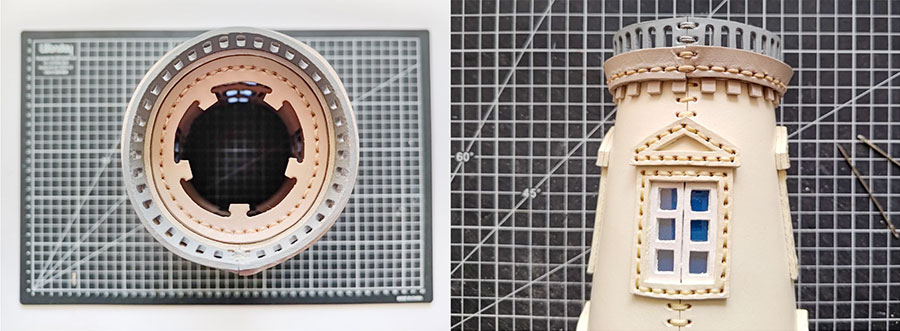
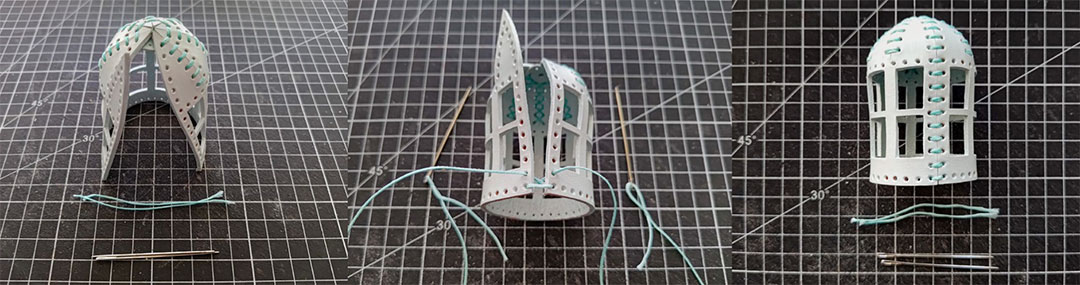
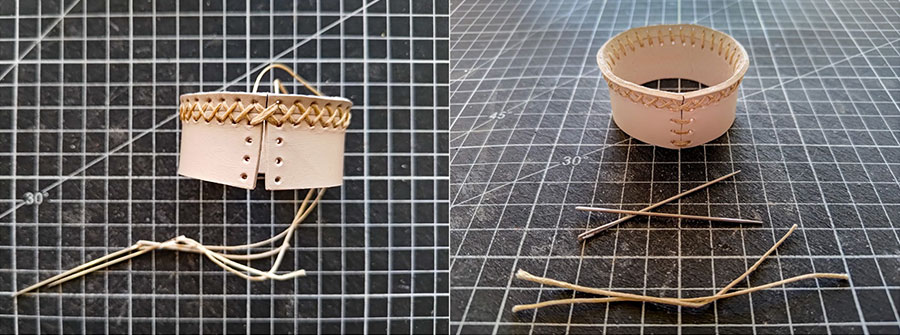
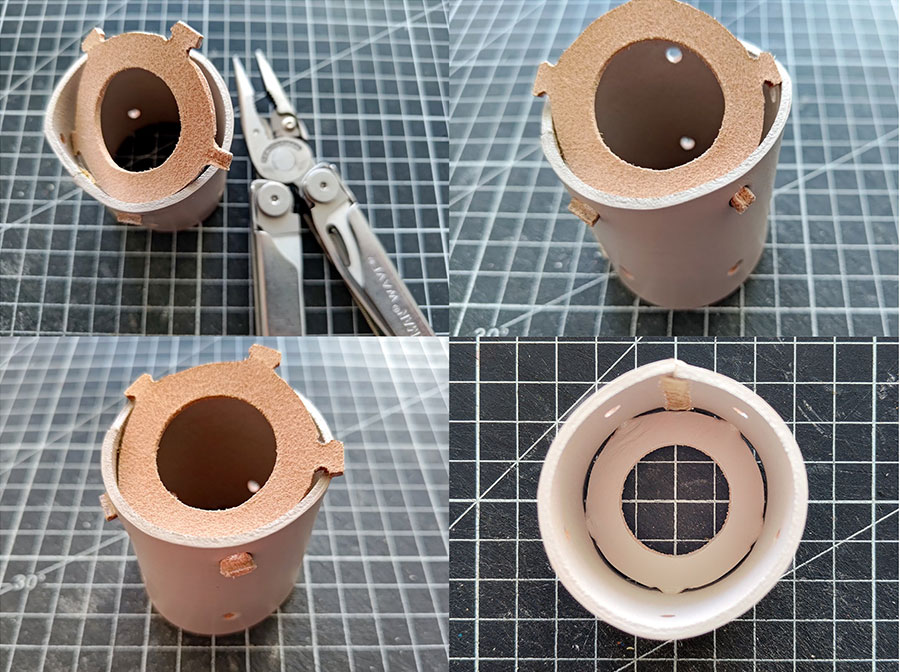
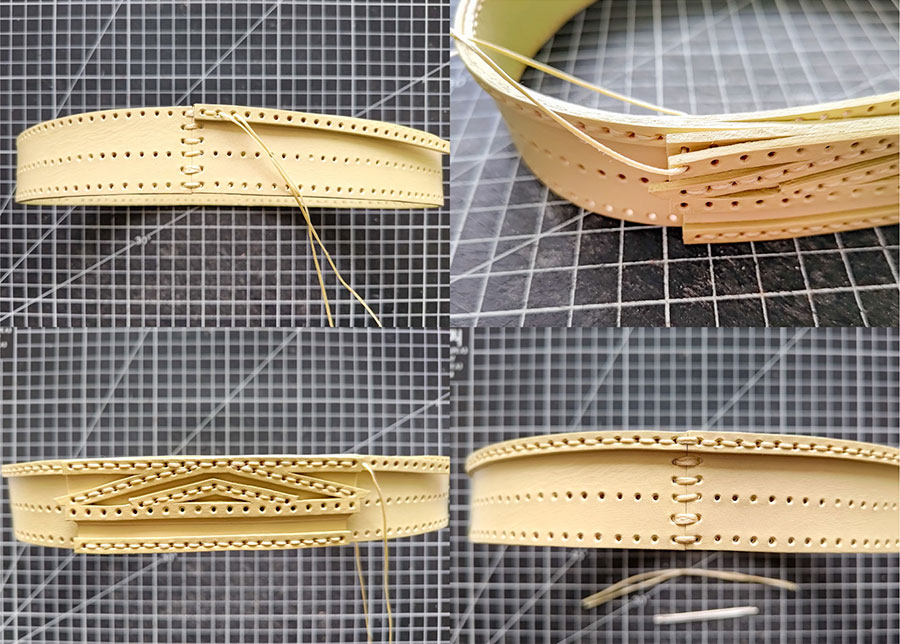
To create the shaft of the lightbulb holder, connect the two opposite ends with a cross- stitch.
The bottom of the shaft is held in place using a stitch-less technique. The 5 little tabs are folded using a pair a pliers. This makes them small enough to be inserted into the holes of the shaft. Finally they are unfolded to secure the bottom piece in place.
Be mindful of the the orientation of the shaft when adding the bottom. The correct holes to use are the ones located the closest to their nearest edge.
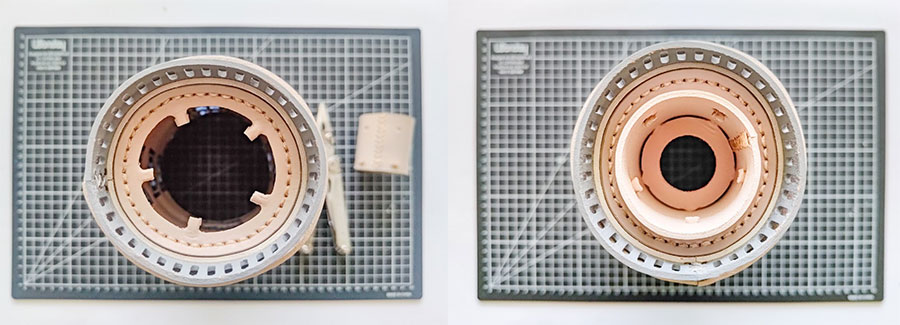
Use the same assembly method to secure the lightbulb holder to the terrace. Fold the 5 little tabs of the terrace. Inert them in the 5 holes of the lightbulb holder and unfold them.
7.3、Third level
Connect the two ends of the outer wall with a cross-stitch to form a cylinder (holes 26 to
27).
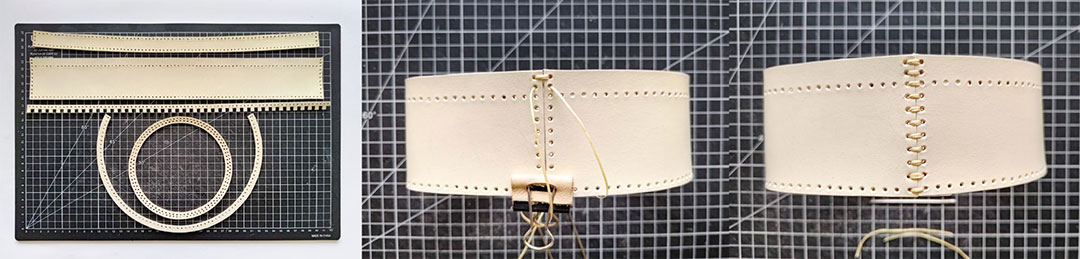
Then connect the two ends of the inner wall using a cross-stitch (holes 28 to 29).
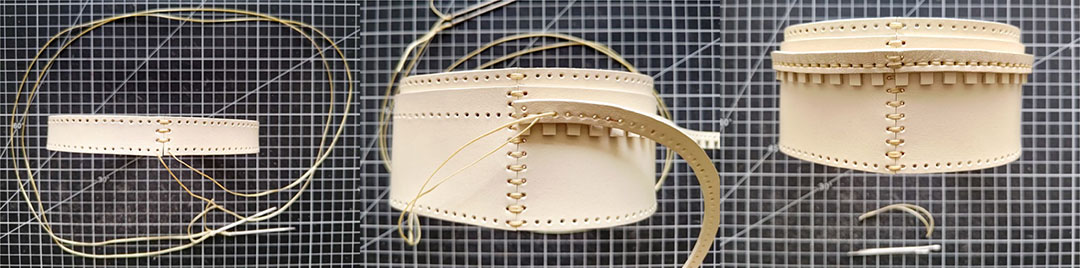
With the same thread, stitch together the cornice, the crenellation, the outer wall and the
inner wall in that order using a saddle-stitch (holes 30 to 31). Finally connect the last two holes of the cornice (holes 32).
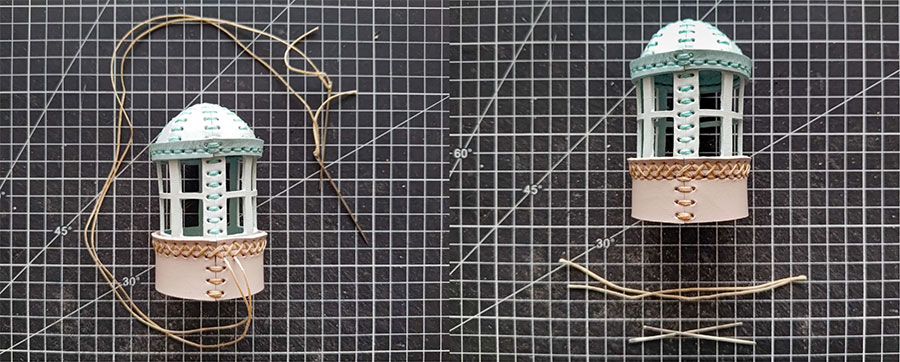
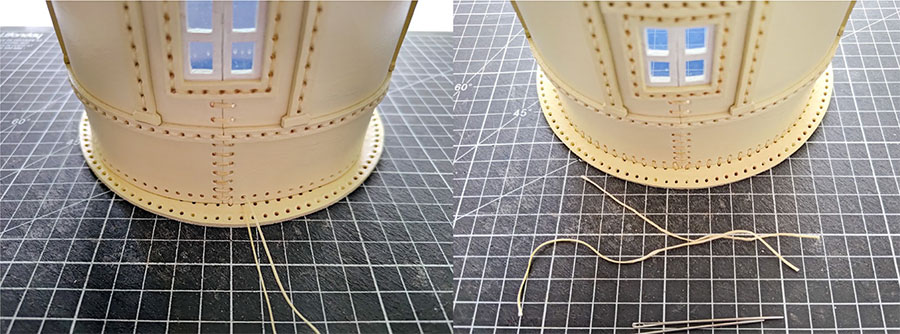
Up next is the terrace. Something to be mindful of and that will apply to both ter- races: to make sure that the levels line up, you need to start stitching at the location where both concentric rings of stitching holes align. I added a grey line to the pat- tern to make it easier to find that spot.
Stitch the bottom of the outer wall to the inner-most stitching holes of the terrace (holes 32 to 33). Use a combination of box-stitch and cross-stitch in order to connect the two pieces securely.
Finally stitch the second level to the base of the tower shaft using a saddle stitch (holes 34 to 35). The inner wall goes over the base of the tower shaft.
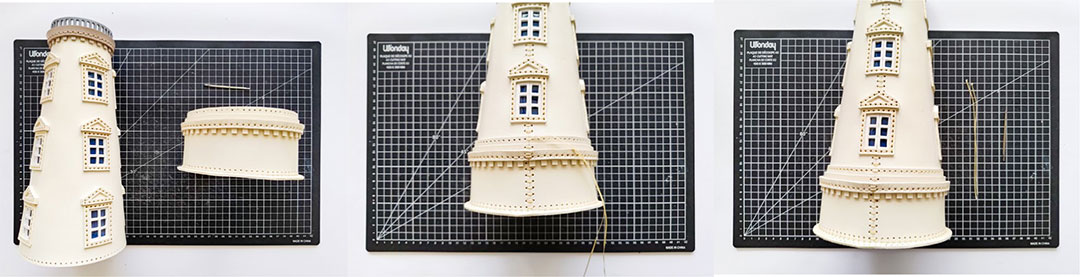
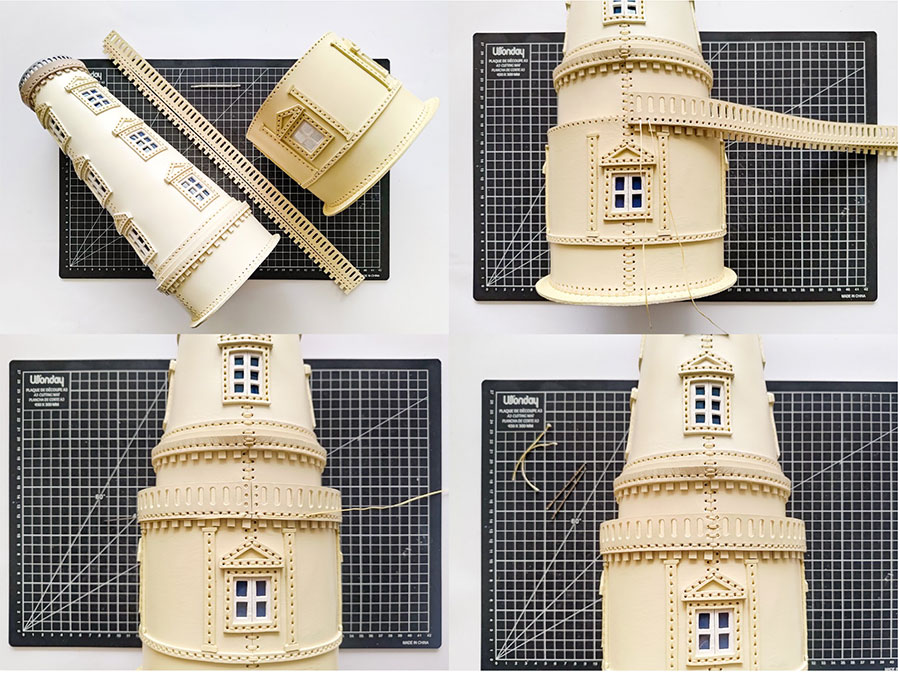
7.4、Second level
Stitch the 8 columns of the second level to the wall.
Then stitch the 3 central windows following the same process used to stitch the windows of the tower shaft.
Connect the two ends of the tower shaft to form a cylinder by using a cross stitch above
and below the location of the remaining window (holes 36 to 37 and 38 to 39). Then stitch on the window to finish shaping the cylinder.
Stitch the lower cornice around the wall using a saddle-stitch (holes 40 to 41).
Stitch the terrace to the bottom of the wall following the same process used for the third level (holes 42 to 43).
To connect the second level to the terrace of the third level, use a box stitch going through the railing, the crenellation, the wall and linking to third level’s terrace at a 90 de- grees angle (holes 44 to 45).
Finally stitch up the two ends of the railing using a cross-stitch to complete that level (up to hole 46).
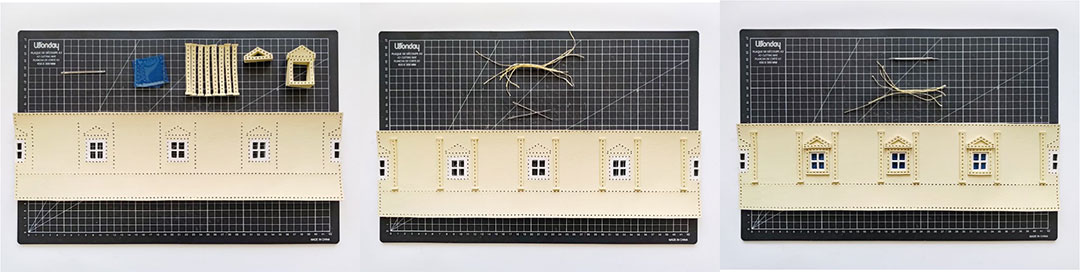
7.5、First level
Prepare the frontispiece by stitching the upper feature and the lower feature to the back-
ground using a saddle stitch.
For the upper feature, only stitch the chevrons. Keep the horizontal stitching lines un- stitched as we will use them to attach the frontispiece to the terrace wall.
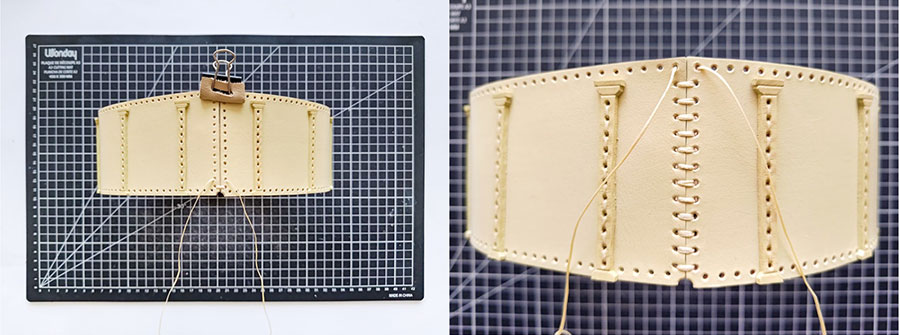
Connect the two ends of the terrace wall with a cross-stitch to form a cylinder (holes 47 to 48).
Start stitching the upper cornice around the terrace wall using a saddle-stitch (holes 49 to 52). Exactly 44 holes after the first hole, add the frontispiece on top of the cornice (holes 50 to 51).
Repeat the same process for the lower cornice to complete the terrace wall (holes 53 to 56).

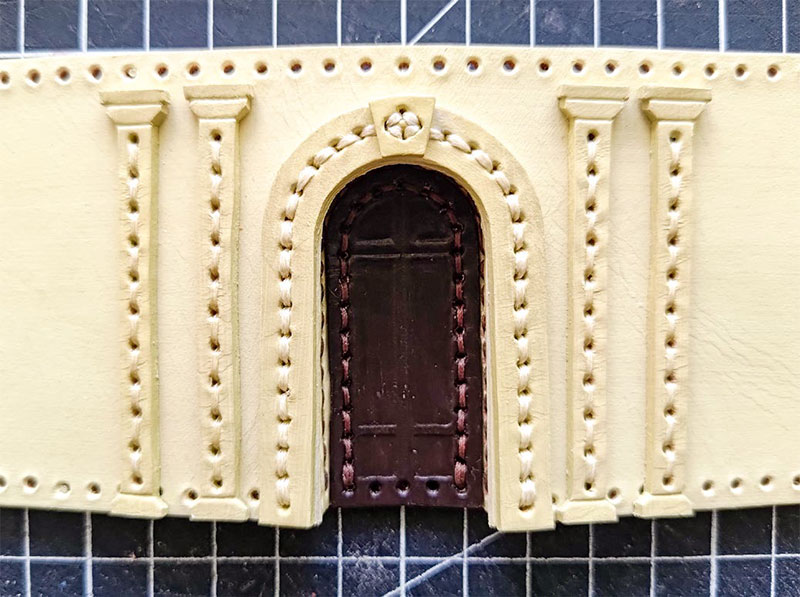
Stitch the 12 columns to the wall using a saddle-stitch. The small foot of the column goes at the bottom.

Stitch the casing and the jamb of the front door to the wall using a box-stitch. The side of the jamb connected to the wall is the one with the most holes.
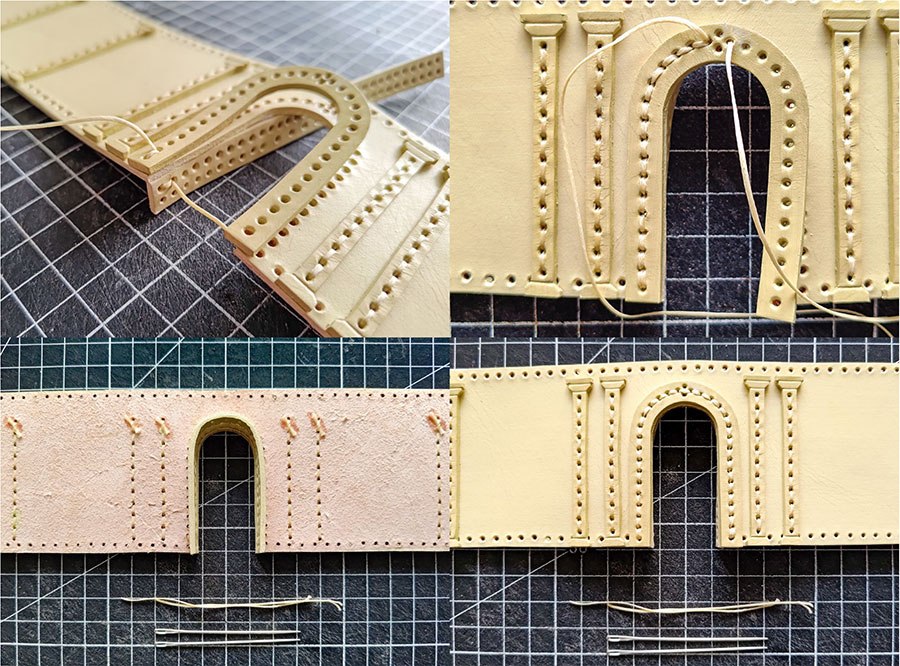
Stitch the perimeter of the door to the jamb using a box-stitch.
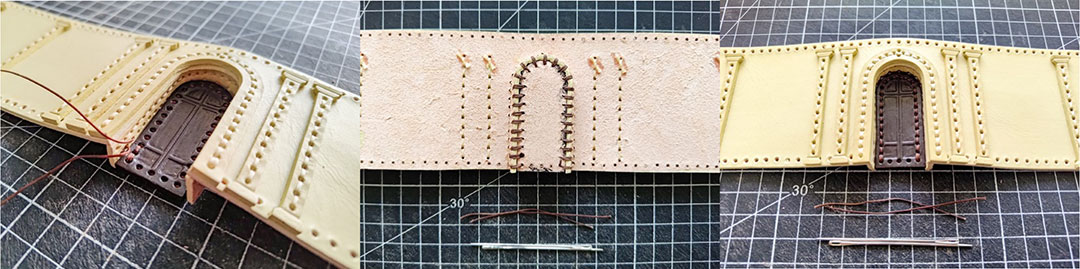
Complete the door by stitching the decora- tive chevron to the top of the casing.
Connect the two ends of the wall with a cross-stitch to form a cylinder (holes 57 to 58).
To connect the first level to the second level, use a box-stitch going through the bottom of the terrace wall, the wall and terrace of the second level at a 90 degrees angle (holes 59 to 60).
Lift the bottom of the frontispiece to access the holes of the terrace wall located under the lower feature.
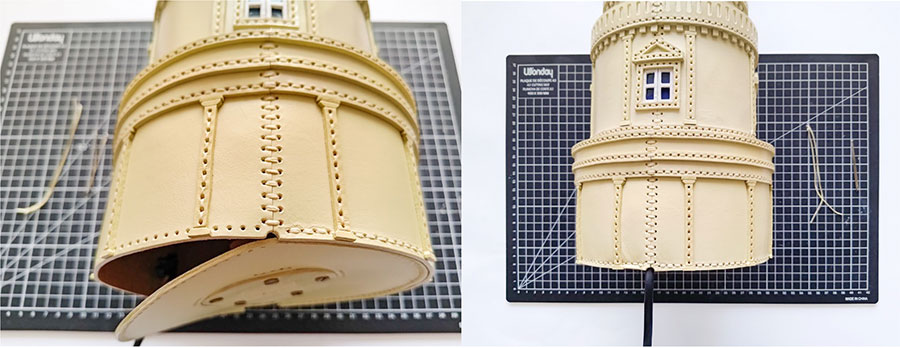
7.6、Base, lightbulb holders and wiring
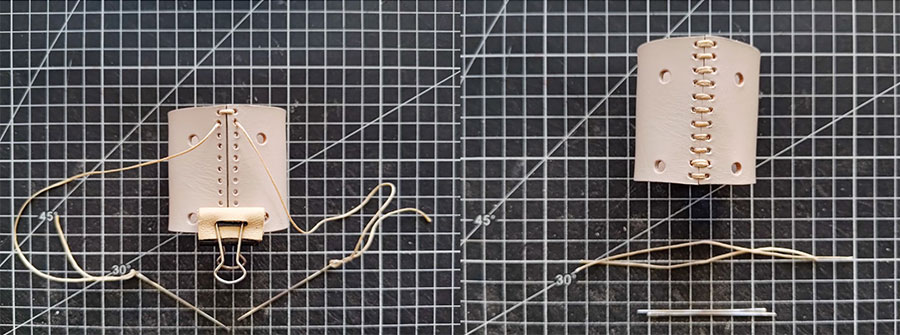
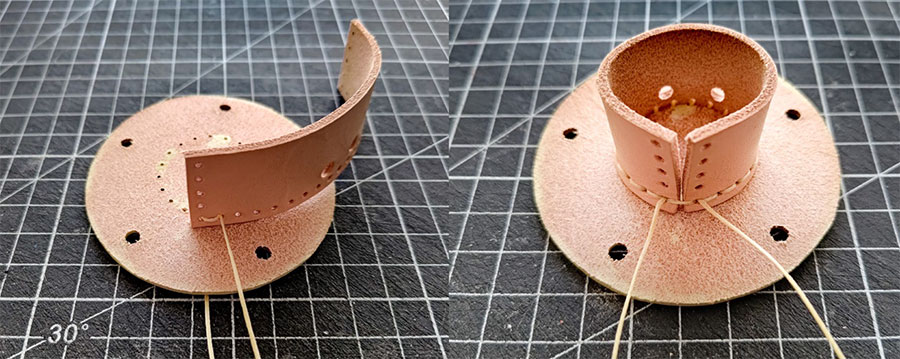
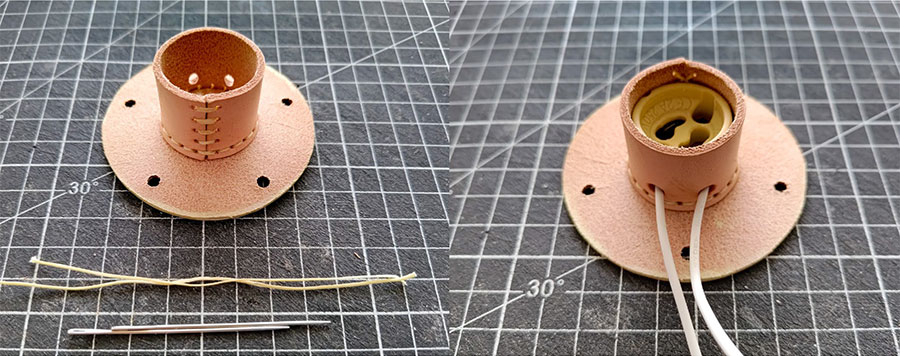
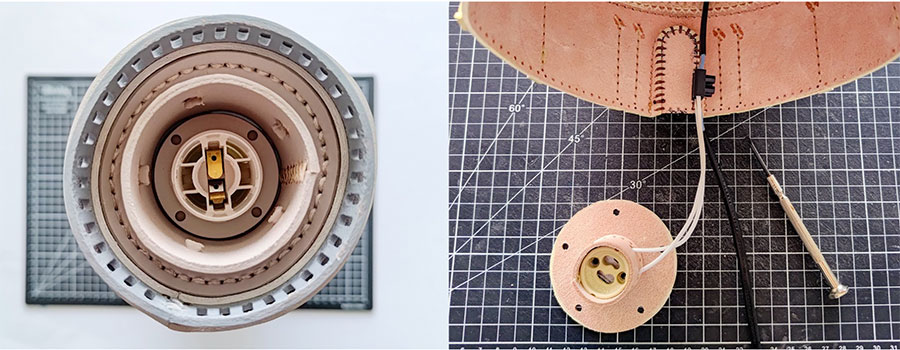
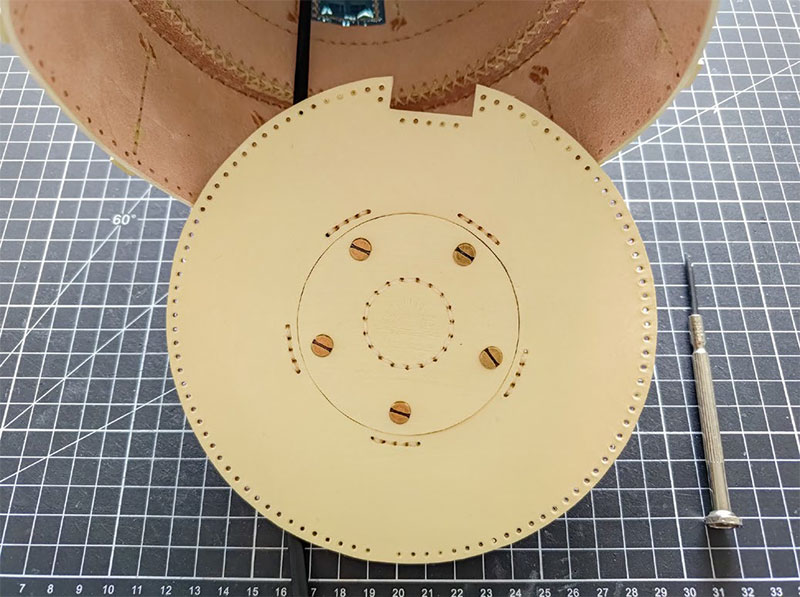
Stitch the 5 lightbulb holder tabs to the flesh side of the base using a saddle-stitch.
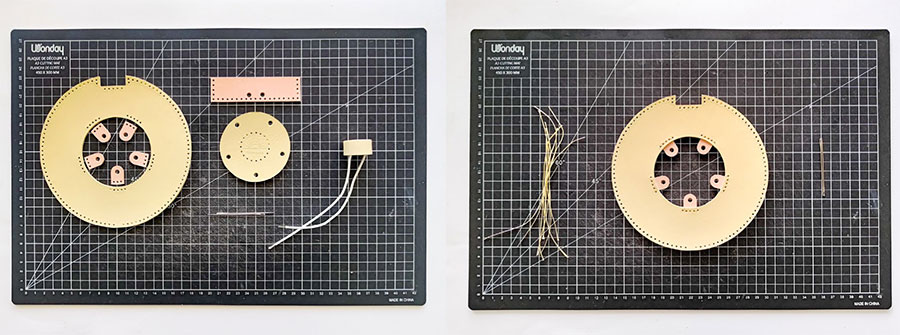
Assemble the lightbulb holder by first stitching the bottom edge of the wall to the bottom using a box-stitch.
Then form the cylinder by stitching up the two ends using a cross-stitch.
Finally insert the socket in the holder, with the two wires exiting through the holes.
The pattern comes with two holder options: one for GU-10 lightbulbs and one for E27 lightbulbs.
I am not electrician! Use your best jugement while proceeding with the following step.
Currently the power cord only connects to one of the two sockets. Thus we need to create
a derivation so that the lightbulb sitting at the bottom of the lighthouse is powered as well.
Cut the power cord 40cm away from the socket and strip both wires at each of the two ends of the cord.
Screw the E14 socket to the bottom of the lightbulb holder at the top of the tower.
Use the method of your choice to connect the exposed wires coming from the E14 sock- et and the wires coming out of the socket located at the bottom of the lamp to the cord coming from the plug so that both sockets are powred.
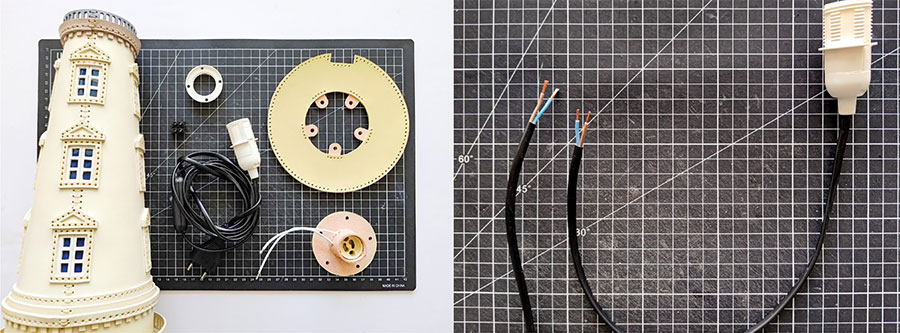
Make sure that everything works as intend- ed. If your electrical wiring doesn't bust into flames, proceed with the next steps.
Use 5 Chicago screws to secure the lightbulb holder to the base of the lamp.
Glue the barrels to the tabs using a dab of super glue so that they can’t rotate when screwing on the screws.
Next stitch the bottom of the door to the base using a box-stitch (holes 61 to 62).

Stitch the base to the bottom of the jamb (holes 63 and 64) using a box-stitch and contin- ue stitching the first half of the base to the bottom of the wall until you reach the power cord opening (holes 65 to 66).
You will notice that some stitching holes are located underneat the feet of the columns. Simply lift each foot carefully to use those stitching holes.
Repeat the same operation for the other half of the base (holes 67 to 70) to complete the lighthouse and congratulate yourself for all your hard work!
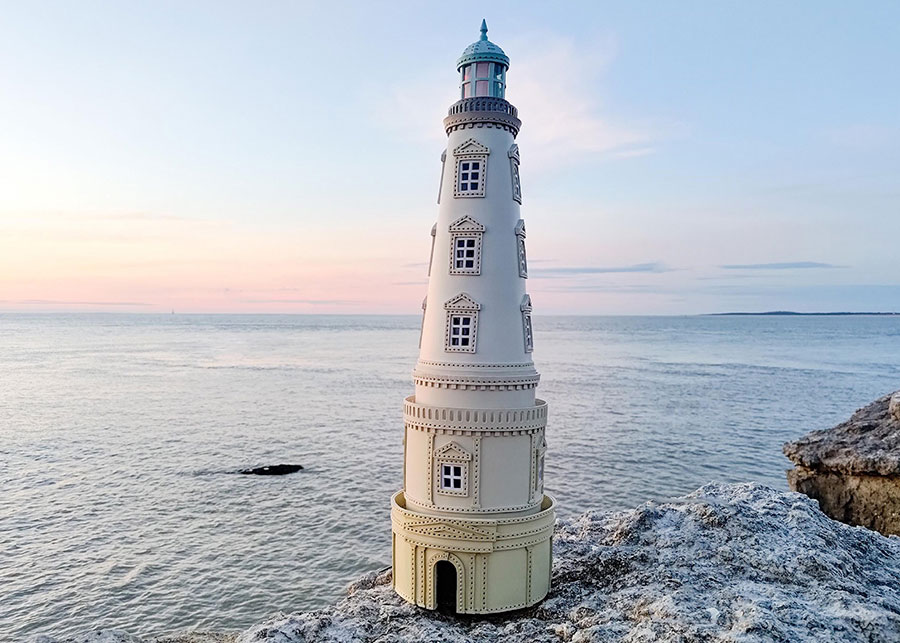
8、Fitting the lantern room to the tower
The lantern room is made to be easily removed so that the lightbulb at the top of the light- house can be replaced. To fit it, simply slide it on the edge of the ligthbulb holder protrud- ing from the terrace. It should fit snuggly.