Materials and Tools You'll Need:
- Leather [Recommended thickness: (1.2 - 2.4 mm) _ (3 - 6 oz)] Cutter
- Hole punch (3 mm)
- Leather chisel hole punch
- Glue
- Thread and needle
- Button (snap or magnetic, optional)
- Buckle (20 mm)
- Rivets
- Riveting tool
- Edge polishing tool (optional, for smooth and shiny edges)
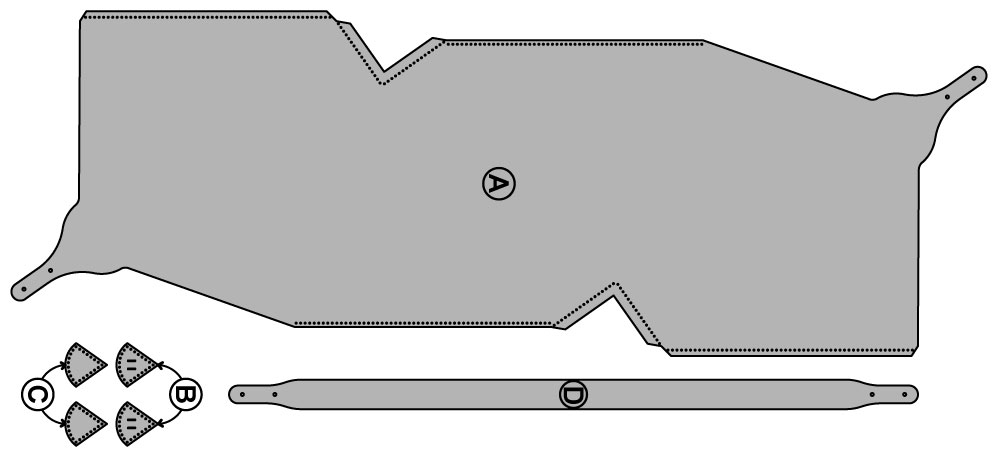
Step 1: Cut the Leather
Prepare to cut the pieces using the template.
Cutting Methods:
1. Cutter or Craft Knife: Place the printed pattern on the leather and carefully cut the pieces by hand.
2. Laser Cutter or Cricut Machine: For precise cuts and intricate designs.
Note: After cutting, punch the stitching holes and rivet holes as indicated in the pattern.
Optional: Smooth and round the edges for a polished finish if desired.
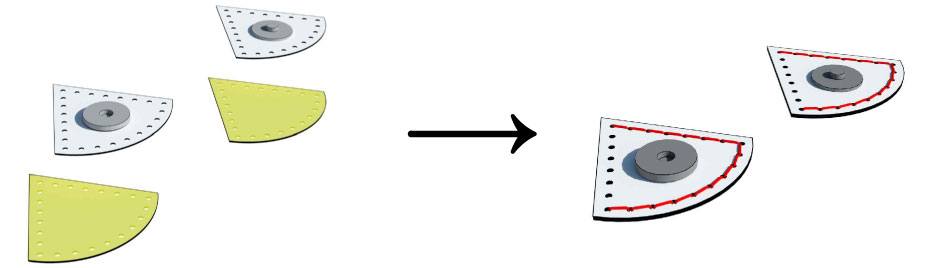
Step 2: Prepare the Button Piece
Attach the button to the designated area on the leather.
Glue the surfaces of the leather pieces as shown in the picture, allowing the glue to air out slightly.
Attach the pieces together and press firmly to ensure a strong bond.
Sew the parts that do not overlap with the main body.
Note: For this piece, it is better to use thinner leather, such as 0.8 to 1.2 mm.
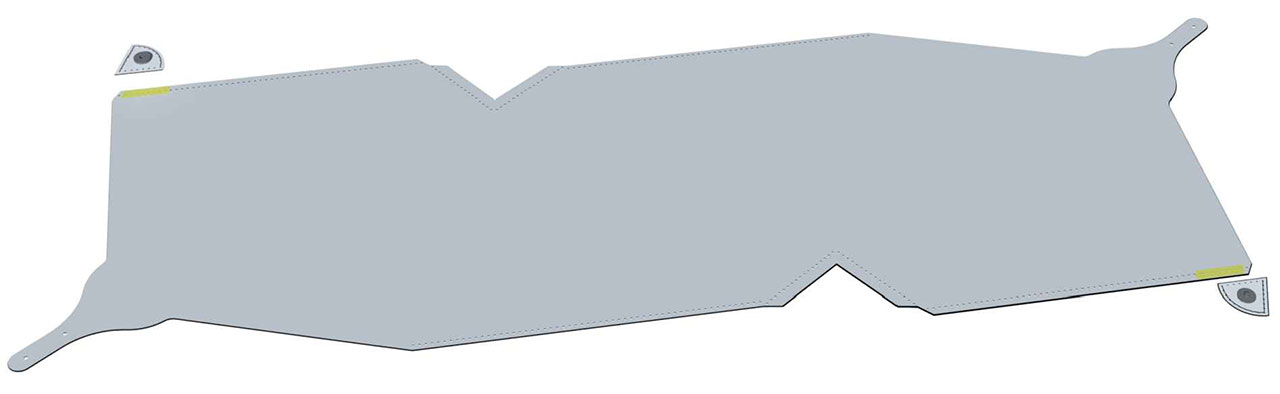
Step 3: Attach the Button Piece to the Main Body
Attach the button piece to the main body of the bag, aligning it with the guide lines on the pattern.
Tip: Use the guide lines for accurate alignment and a professional finish.
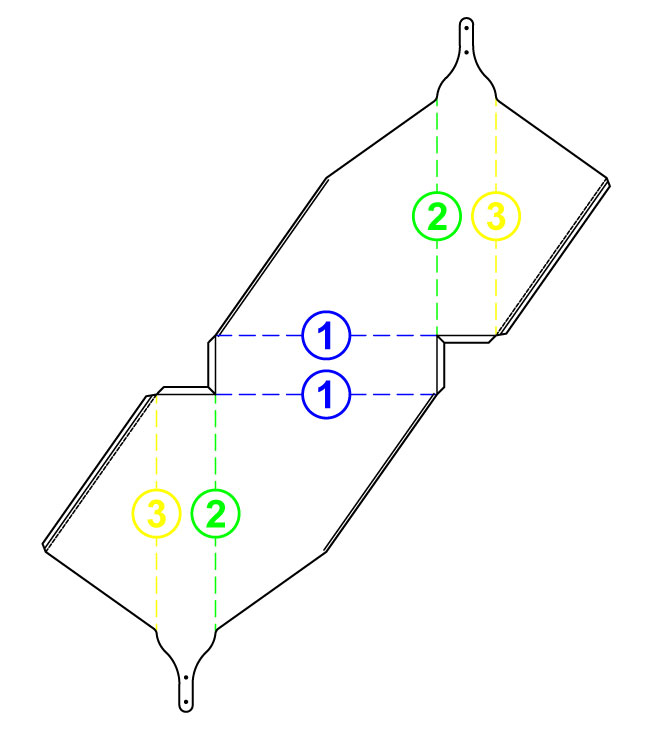
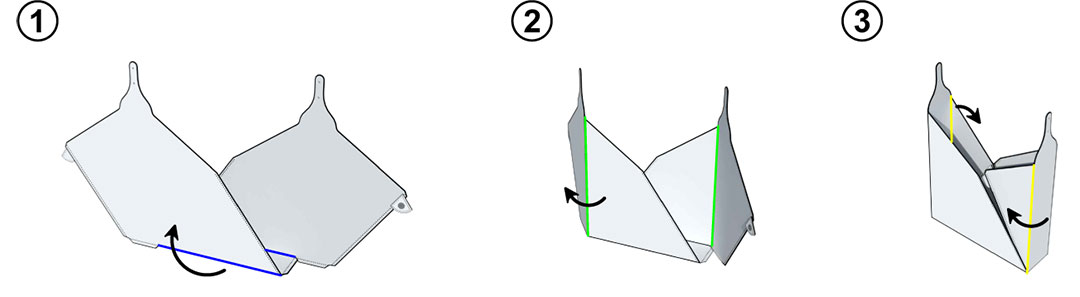
Step 4: Fold the Main Body
Fold the main body according to the picture. Each fold is marked with colors and numbers to guide you.
Tip: Gently press along the fold lines to help the leather hold its shape.
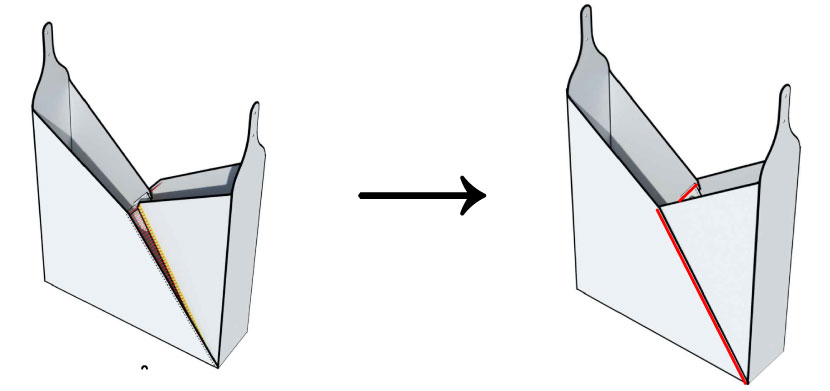
Step 5: Sewing the Body of the Bag
Apply glue to the highlighted areas shown in the picture.
Attach the glued parts and sew along them.
Repeat the process for the other side.
Tip: Use the guide lines on the pattern to ensure proper overlap and alignment.
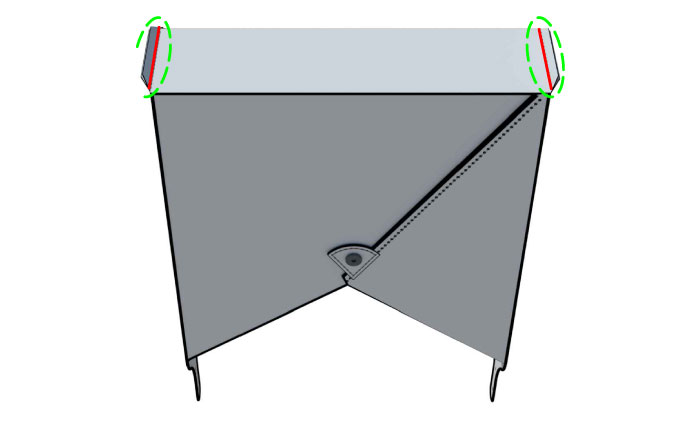
Step 6: Attach and Sew the Bottom Seam
Turn the bag over and attach the bottom seam to the inside as shown in the picture. Sew along the bottom seam to secure it.
Tip: Align the edges neatly for a clean and polished finish.
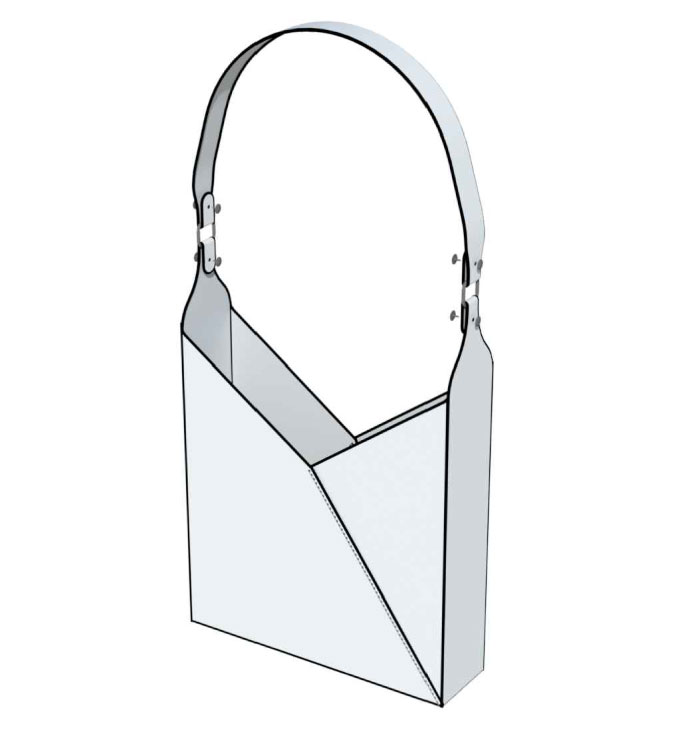
Step 7: Attach the Handle to the Main Body
With the sewing complete, attach the handle to the main body using the buckle.
Place the buckle in position.
Wrap the leather around the buckle and secure it with rivets.
Tip: Ensure the buckle is centered before securing for a balanced look.
单肩包